Strawberry Margarita Truffles

Strawberry Margarita Truffles

6 months ago a group of strangers from Chef at Large met up for lunch. The meet that started at 12 pm went on till 11:30 pm. We realised we had loads in common esp daaru and madness and thus the Vella Gang was formed.

We laugh, we cry, we share, we drink and we hog together. The best thing that has happened to me in the recent times.

Strawberry Margarita Truffles

Love u loads my vellus. Celebrating our half year anniversary with Strawberry Margarita Truffles with white chocolate, dried strawberries, tequila and a hint of salt.

Strawberry Margarita Truffles

Ingredients

500 gms chopped white Chocolate

1 pkt Amul cream

2 drops Pink gel colour

2-3 tbsp tequila

1/2 cup chopped dried strawberries

1/2 tsp salt

1/2 cup desiccated coconut


  1. In a heavy pan heat cream till scalding, pour over the chopped chocolate. Cover fro 3-4 minutes and then mix till melted. Let it cool.
  2. Add the tequila, salt and dried strawberries. Mix well.
  3. Pour into a greased dish and keep it in the fridge for an hour.
  4. when set, scoop out portions to roll into balls.
  5. coat with desiccated coconut and then keep it in the fridge again for 4 hours before serving.

Walnut & Strawberry Chocolate Fudge

IMG_6674

My daughters school has a Diwali party today and she wanted to me to make something to share with her friends.

IMG_6675 1

It slipped my mind till late last night and then I panicked. God, am late. She is gonna be mad if I don’t make something.

IMG_6673

The easiest recipe came to mind. So made a chocolate walnut fudge with dried strawberries in it. Super fast and sure to impress.

IMG_6672 1

INGREDIENTS

500 gms dark chocolate,

chopped 1 can Milkmaid (sweetened condensed milk)

1/2 tsp salt

1 tsp vanilla extract

1/4 cup chopped walnuts

1/4 cup chopped dried strawberries


  1. Line a baking pan with baking paper and set it aside.
  2. Heat water in a steel bowl, when it bubbles put another bowl with the chopped chocolate on top of it. This is called the double boiler method. Do not overheat the chocolate.
  3. Add the sweetened condensed milk, vanilla and salt. Mix well.
  4. Remove from the heat and immediately mix in the walnuts and strawberries.
  5. Pour into the prepared pan and then refrigerate until firm (at least 2 hours to overnight).
  6. Cut into squares and serve.

IMG_6669 1

Candyland cake

IMG_6510

My son turned 5 and we have been having a countdown since a month. Every time I asked him what cake do u want, he kept having different requests.

IMG_6513

Once he wants a Spider-Man cake then a car cake then a jake and the never land cake then ….

IMG_6512

Finally I told him, leave it to me. Will make something special for u. When the idea of this cake came to me, I was so excited to start that I began having a countdown of my own 😂

Presenting Nirvair’s 2 tiered cake.

IMG_6514

bottom tier – Chocolate cake with Nutella ganache loaded with Oreos, twix, snickers, Mars and bounty.

Top tier – Vanilla caramel sponge with whipped cream and gummy bears, gems and sugar jujubes

Spinach Mushroom & Bacon Quiche

IMG_6252

I just returned from a home bakers convention and feel all geared up to try so many new baked dishes.

For some reason I always baked sweet and never savoury. I secretly always drooled at quiches and pies with the hope of making it some day. The only thing that frightened me was getting the crust right.

IMG_6250

Now when u have a star baker as your dearest friend who especially specialises in savoury bakes, I have nothing to fear 😊 Thanks Gina for the crust recipe


Presenting a delicious Spinach Mushroom Bacon Quiche loaded with cheese

IMG_6251

CRUST:

150 gms all purpose flour + some more for dusting

100 gms cold Amul butter

1 tsp dried oregano

1 egg


  1. Sieve the flour and add the cold butter which has been cut into cubes to it.
  2. Crumble and mix the flour and butter with your fingers till you get a sandy texture.
  3. Add the oregano and mix once.
  4. Break the egg into the dough and mix it well. Do not knead too much.
  5. Bring it together into a dough ball, dust some flour if its too sticky. Avoid overworking the dough.
  6. Cling wrap and leave it in the fridge for 1-2 hours.

FILLING:


3-4 tablespoons butter

2 cups Kellogg’s Corn Flakes cereal, crushed

1 chopped onion

10-15 minced garlic

2 tablespoons all-purpose flour

1/4 teaspoon salt

1 cup milk

1 cup grated Amul cheese

2 bundles chopped spinach,

1 pkt mushrooms – quartered

1 tsp oregano

2 eggs, well beaten

5 slices of bacon


  1. In a large pan, melt the butter over low heat. Remove 1-2 tablespoons to a bowl; mix and set aside for topping.
  2. Side by side, fry the bacon to a crisp and drain on a tissue.
  3. Stir the onion, garlic and sautée till pink.
  4. Add flour and salt. Cook for about 1 minute, stirring constantly.
  5. Gradually add the milk, stirring until smooth. Increase the heat to medium and cook until the mixture comes to a boil, stirring constantly. Remove from the heat.
  6. Add the cheese, stirring until slightly melted. Stir in the spinach, mushroom, bacon, eggs, and 3/4 cup crushed cornflakes. Mix well

IMG_6260 1

ASSEMBLY


  1.  Preheat the oven to 175-180 deg C.
  2. Remove the pastry dough from the fridge and roll it out into a big circular shape. Don’t make it too thick or too thin. Ensure that it is even all over.
  3. Gently place it in a tin/borosil casserole. Press lightly agains the bowl to take its shape. Be careful to fill any tears and ensure its even everywhere. Trim off the edges where its excess. Gently prick the base with a fork to ensure that it wont rise when baked.
  4. Place a parchment paper over the dough and fill it with Rajma beans.
  5. Bake for 10 mins (top and bottom) and 5 mins on bottom rod. U will see a slight golden colour to your crust. Switch the oven off. Leave it in the oven for 10 mins
  6. Spread the filling mixture in the dish. Sprinkle the reserved cereal topping over the spinach mixture. Sprinkle the left over melted butter on top
  7. Bake for about 25 minutes, or until heated through. Leave in the oven for 10 mins after its done
  8. Serve hot


Eggless Lemon Almond cupcakes

IMG_5590

Are u fed up of chocolate cakes. I know I am. Though not for long. Chocolate is one of my true loves 😍

But once in a while, you need a change. Something lemony, tangy, delicious. These eggless lemon almond cupcakes with a lemony whipped cream hits the right spot.

IMG_5591

Ingredients


All purpose flour – 1 cup + 2 tablespoons

Baking powder – 1/2 teaspoon

Baking soda – 1/2 teaspoon

Salt – 1/4 teaspoon

Oil – 1/3 cup

Castor sugar – 3/4 cup

Yogurt – 1/4 cup

Milk – 1/3 cup

Lemon juice – 1/4 cup

Lemon zest – 1 tsp

Pure vanilla extract – 1 teaspoon

Ground almonds – 1/3 cup


  1. Pre-heat the oven to 180 degree C for at least 10 minutes.
  2. Line a muffin tray with paper liners or spray it with nonstick cooking spray or lightly butter it.
  3. Take first four dry ingredients in a bowl. Mix it till incorporated.
  4. Take oil and sugar in another bowl. Whisk it using wire whisk or hand mixer or stand mixer. It will be sand like texture.
  5. Then whisk in yogurt, milk, zest, juice and vanilla extract.
  6. Add dry ingredients to wet. Whisk till incorporated.
  7. Add ground almonds and mix it in.
  8. pour into cupcake tray lined with paper liners.
  9. Bake in a preheated oven for 18-20 minutes or till toothpick inserted into the center comes out clean.
  10. Remove it from the oven; let it cool into the pan for 5 minutes. Then remove it to cooling rack and let it cool completely.

Recipe – http://www.spiceupthecurry.com/eggless-lemon-cupcakes-recipe/

IMG_5588

LEMON WHIPPED CREAM

1 cup of whipping cream

1 tbsp of lemon juice

2 tbsp of icing sugar

colour of your choice (Gel or icing) – optional


  1. Chill the beater blades and the steel vessel u will use for 15 mins in the fridge
  2. Let the cream also be semi frozen
  3. Pour the cream in the steel vessel and put it on an ice bath (big plate with lots of ice cubes)
  4. Avoid any bodyheat when holding the vessel, use an electric hand beater and whip it till its stiff.
  5. Add the sugar and lemon juice, continue to whisk till it peaks. A test is if you overturn the bowl, it should not drip.
  6. If the cream doesn’t peak, keep everything in the fridge for 10 minutes and then continue whisking.

IMG_5589

Oats & DDL Hazelnut Bars

IMG_5408 1

We keep Ganpati at our home every year and it’s such a pleasure to make prasad for Ganpa. But sometimes I am in fix on what to make as I don’t make Indian sweets much.

IMG_5407 1

Then I remembered these bars that I made during the DDL (Dulce De Leche) craze. Sweet, salty, crunchy, Delicious.

IMG_5409 1

Showcasing my lovely birthday gifts from my darling friends who actually look like twins but have never met each other. Gina and Alicia. I love the beautiful crockery

Hope Ganpa loves these yummy baked bites, I know we all did 😄

IMG_5410 1

Ingredients

1 1/2 cups all-purpose flour
1 1/2 cups Quaker oats
1 cup packed brown sugar
1/4 teaspoon salt
1 cup butter, softened
1 can dulce de leche
1/2 cup chopped hazelnuts

  1. Heat oven to 200 degrees C.
  2. In large bowl, mix flour, oats, brown sugar and salt.
  3. Cut in butter and mix until mixture is crumbly. Press 1/2 of mixture in greased pan. Bake 10 minutes.
  4. Meanwhile, in a double boiler, heat dulce de leche, stirring frequently, until slightly softened.
  5. Spread dulce de leche over partially baked crust. Sprinkle evenly with chopped hazelnuts and remaining crumb mixture.
  6. Bake 20 to 25 minutes or until golden brown. Cool 15 minutes.
  7. Run a knife around sides of pan to loosen it. Set in the fridge and cool completely.
  8. Cut into bars.

Burmese Khow Suey

IMG_4948 1

A meal in a bowl, looks simple and wholesome but some dishes take a whole lot of effort to prep. One such dish is the Burmese Khow Suey

IMG_4949 1

Khow Suey is a noodle dish that comes from the mountainous Shan State. It is a one-dish soup meal made of egg noodles and curried beef or chicken with coconut milk, served with a variety of contrasting condiments. A squeeze of lemon also adds tanginess to the dish (source-wiki)

A colourful flavoursome dish that hits the right spot on a lazy Sunday afternoon

IMG_4947

Ingredients

300 gms noodles
300 gms boneless chicken
1 tsp soy sauce
2 chopped onions
1 tbsp grated garlic (about 4 cloves)
1/2 tbsp grated fresh ginger (about an inch)
1/2 tsp turmeric powder
1 tsp red chili powder
2 packs Coconut milk
1/2 a lime
Salt to taste
1 tbsp besan mixed with little water

For the toppings/ garnishes:
5 boiled eggs
6 cloves sliced garlic

2 sliced onions

handful of chopped coriander
lime wedges
1-2 chili peppers
oil

  1. Prepare all the toppings and garnishes. Hard boil the eggs, roughly chop the coriander and finely slice the onion, garlic and chili peppers at an angle. Set them aside in little condiment bowls.
  2. Heat 3-4 tablespoons of oil in a small pan. Then fry the garlic slices until they turn a light golden. Remove them as soon as they turn golden (it’s literally a few seconds from golden to burnt) using a slotted spoon and place them on a paper napkins to drain the excess oil.
  3. Separate the onion layers, into strands and fry them in the same oil the same way you fried the garlic, until it turns golden. It’s best to do them in batches if your pan is small so that it browns evenly. Remove the fried onion with a slotted spoon and drain it as well.
  4. Transfer some of the same oil (now flavored with garlic and onion) to a large pot.
  5. In the meantime, boil your chinese style noodles, as per packet instructions. Leave it out to dry.
  6. grind together onion, ginger, garlic, soy sauce to a paste.
  7. In the leftover oil fry the paste for 2 mins. Add chicken and mix well. Brown the chicken.
  8. Sprinkle the turmeric powder, red chilli powder and some salt. Lower gas, add 1 packet coconut milk and stir.
  9. Mix besan with little water and add it to the gravy
  10. Once the chicken is cooked add the second packet of coconut milk. Bring to a boil and shut the gas. Squeeze half lime juice.
  11. Adjust seasoning and add little water if too thick. Serve hot.  With all the condiments.

Cheesy Palak Corn Tikkis

IMG_4795 1

A dish that fails me every time are tikkis. Yeah I admit it. A basic thing like Tikki, I don’t seem to get it right.

IMG_4797 1

Then I went for a potluck and had this really interesting Tikki. I thought it was harra bharra and took a bite sceptically as I am not too fond of peas. I just loved it and immediately caught hold of this amazing baker and chef – Sangheita for the recipe.

IMG_4798 1

This one is way different from the Harra Bharra kebab and the mix of palak, corn, potato and cheese makes this super Yumm.

IMG_4796 1

Ingredients

1 cup raw sweet  corn

1 bunch raw palak

3 green chillies

8 garlic cloves

5-6 boiled potatoes (2 cups)

1 tbsp butter + oil

1/2 tsp garam masala

1 tsp sugar

salt

1 lime

2 bread slices

grated pizza cheese

chilly flakes

breadcrumbs

1 tbsp cornflour mixed with water

  1. Grind corn, chopped palak, garlic, chillies in a mixer to a fine paste. Avoid water unless necessary.
  2. In a nonstick pan, add butter and oil and add this paste to it.
  3. Add salt, sugar, garam masala, lime juice and chilli powder if u wish.
  4. Mix well and let this paste get dry. Shut the gas and let it cool
  5. Mash the potatoes and add this spinach corn mix to it. Adjust seasoning.
  6. Make small pieces of the bread slices and add it to this mix.
  7. Make small balls and hollow the centre, add a mix of grated cheese and chilli flakes and seal the ball well.
  8. Make flat tikki shapes, dip in cornflour slurry and coat with breadcrumbs.
  9. Pan fry with a little oil to get a golden brown on both sides.

Makes 12-15

Smoky Dal Tadka & Shahi Kadhai

IMG_4608

I am no veggie lover. I barely cook exotic vegetarian cuisine, so when I got an order inquiry for vegetarian restaurant type food, I was like no problem Paneer hai na.

Then the client said, NOoo I want a rich mixed vegetable dish and Dal that’s something different.

I was like sure why not. As soon as I keep the phone, messaged my vegetarian friends. Kya banau. Am in a fix. I don’t eat nor do I order vegetarian dishes at restaurants.

IMG_4609

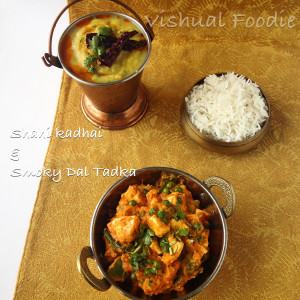
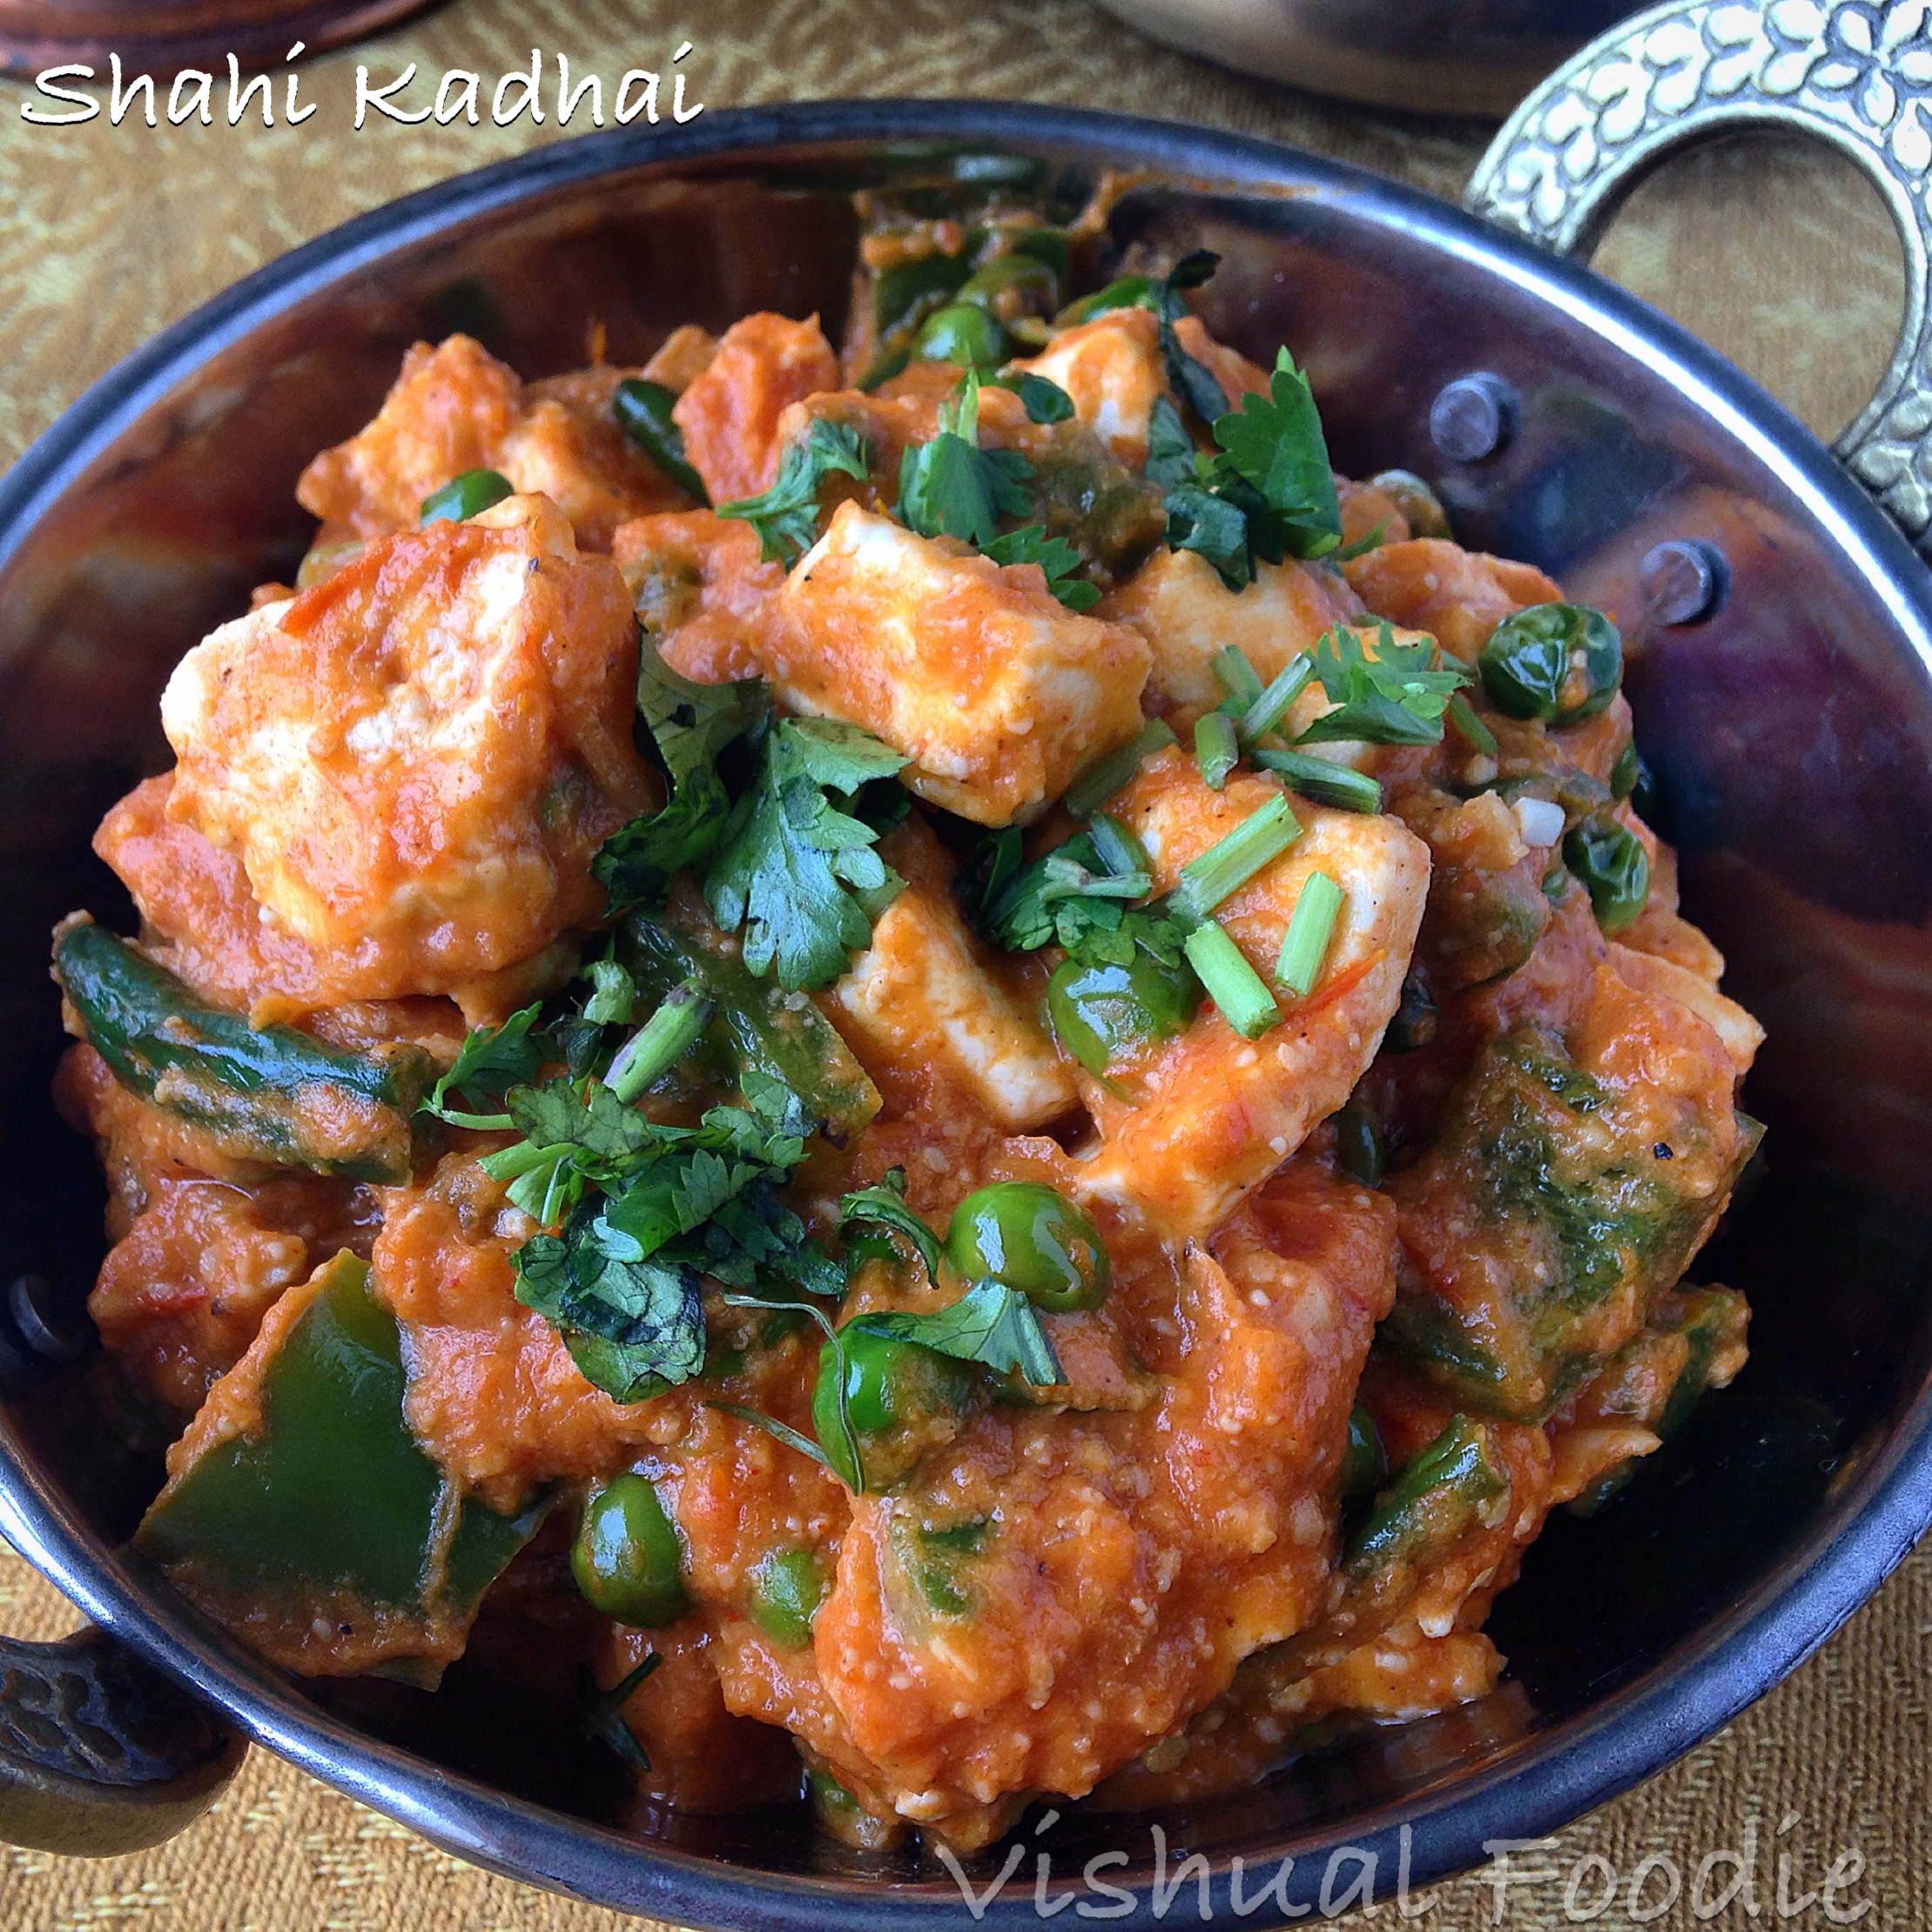
So finally settled in on Shahi Kadhai. Which is mixed vegetables with cashew and khuskhus paste to give it the richness.

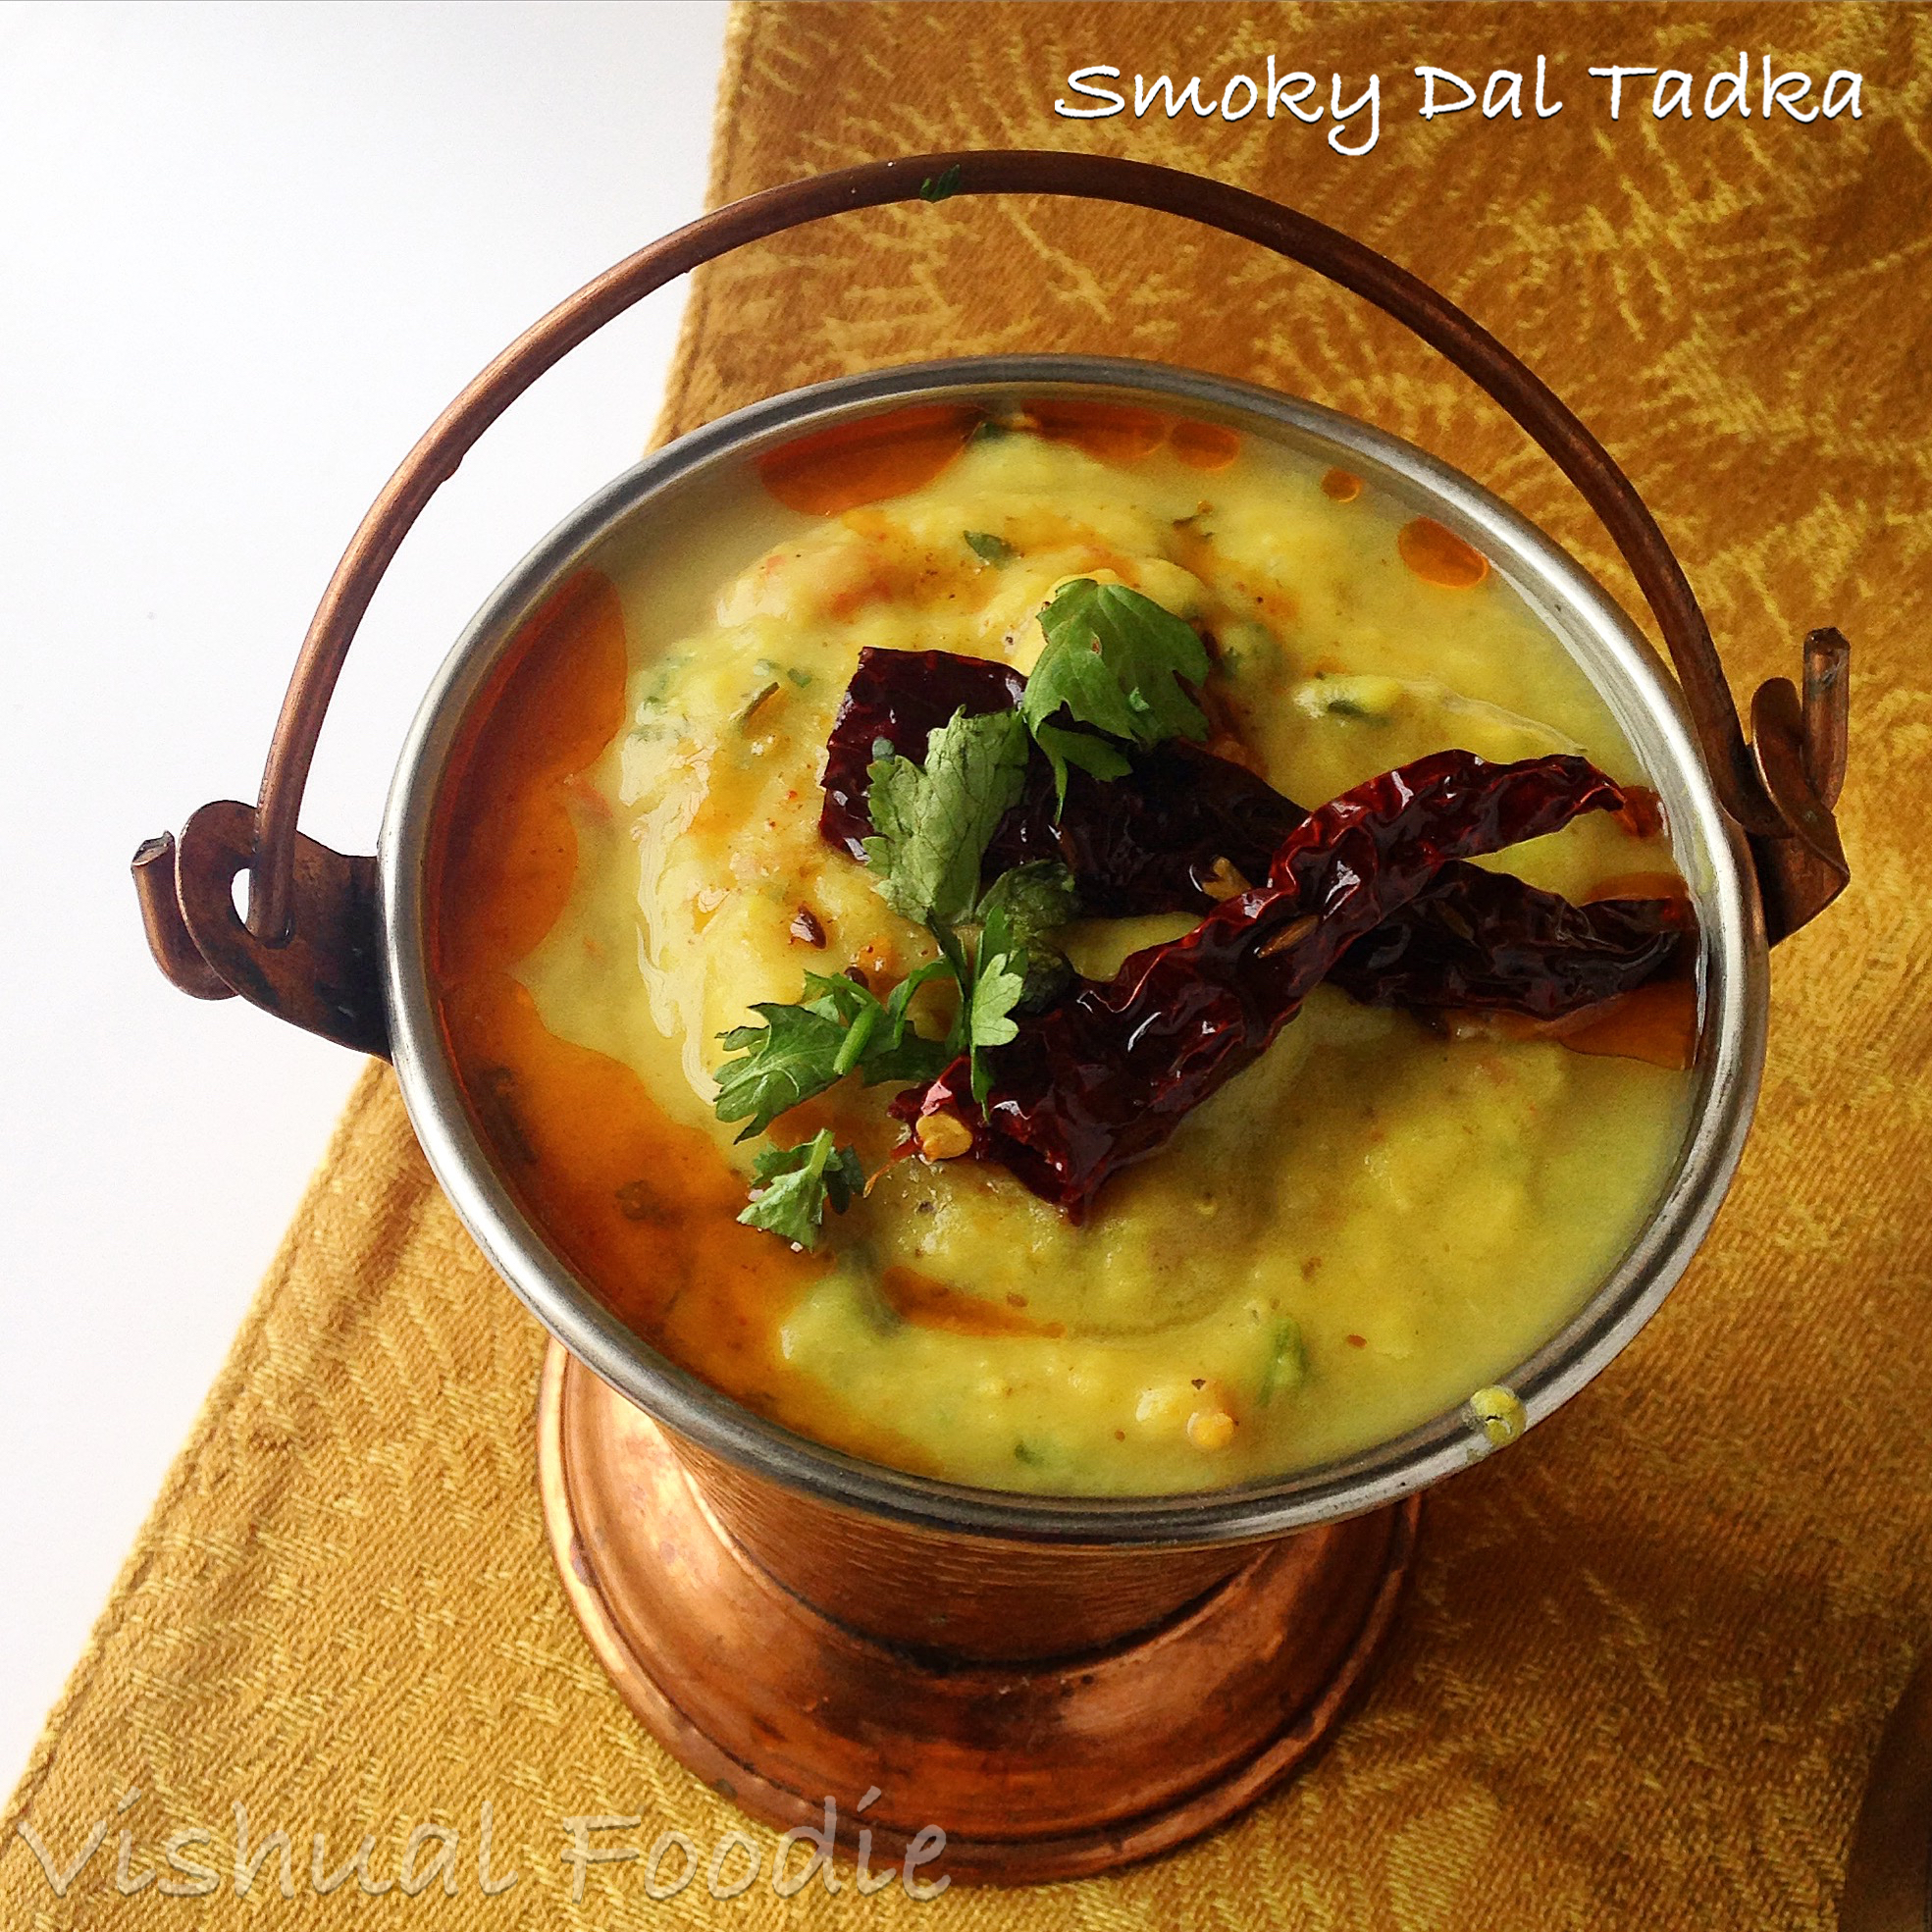
The other dish I made is Smoky Dal Tadka from www.vegrecipesofindia.com. The Dal gets elevated to another level by incorporating the smoke from burning coal.

IMG_4610

SHAHI KADHAI

Boil together

Tomatoes – 6-7 (cut into 4 pcs)
Onions – 2 quartered
chopped Ginger – 1″
Garlic  – 6 cloves
Green chili – 2
Red chili powder – 1 tsp
Cloves – 8
Green cardamom – 7
Salt to taste
Water – enough to cover the tomatoes
Ghee – 1-2 tbsp
10-12 cashew
KhusKhus – 2 tsp
Half cup hot water
Chopped coriander

150 gms french beans

100 gms carrots

200 gms peas

100 gms capsicum

200 gms paneer

1 tbsp garlic paste

salt

1-2 tsp veg masala – kitchen king or kadhai masala

Method:

  1. Take a heavy bottomed vessel and boil the tomatoes, onions, water, ginger, garlic, green chili, red chili powder, cloves, green cardamom and salt. U can tie the cloves and cardamom in a muslin pouch or cloth as you will need to discard them later.
  2. Put the vessel on high heat for the first 5 minutes and then lower the heat to medium.
  3. Reduce this mixture to a sauce like consistency for about 20-25 minutes.
  4. Once the curry is done, shut off the flame and let it cool a bit. Once it is a little cool, take out the cloves and cardamoms.
  5. Meanwhile soak the cashew and khuskhus in hot water for 20 mins. Grind to a fine paste.
  6. Side by side, cut the vegetables and paneer. Heat some oil in a pan, add the garlic paste and saute the vegetables on high heat. Add salt and the veg masala at the end when nearly cooked
  7. Remove the vegetables and saute the paneer in the same pan. Keep aside
  8. When cool, puree the curry till it gets a smooth creamy texture in a mixie.
  9. Heat ghee and put the curry back into the heavy bottomed pan and bring to boil.
  10. Heat this for 5 minutes on medium flame, making sure that everything is well incorporated. Adjust salt and spice.
  11. Add the cashew khuskhus paste and let it cook out for 5 mins.
  12. Now add the sauteed vegetables and mix it well once. Shut gas and add chopped coriander.

IMG_4611

SMOKY DAL TADKA – vegrecipesofindia


½ cup tuvar dal + ½ cup masoor dal

1 or 2 green chilies, chopped or slit lengthwise

1 medium sized onion, chopped

2 medium sized tomato, chopped

½ inch ginger, finely chopped

1 tsp turmeric powder/haldi

a pinch or two of garam masala powder

a pinch of asafoetida/hing

2.5 cups water for pressure cooking

1 tsp kasuri methi/dry fenugreek leaves, crushed

1 or 2 tbsp cream

1 tbsp chopped coriander leaves

salt as required


for the tempering/tadka:
  • 2 tbsp oil or 1.5 tbsp ghee or butter
  • 1 tsp cumin seeds/jeera
  • 5 to 6 garlic cloves/lahsun, finely chopped
  • 2 to 3  dry red chilies
  • a generous pinch of asafoetida/hing
  • ½ tsp red chili powder
for garnish:
  • 1 tbsp chopped coriander leaves/dhania patta
for the dhungar method:
  • a small piece of charcoal
  • ¼ tsp ghee or oil

METHOD

  1. rinse the dals and add them to the pressure cooker.
  2. to the lentils, add chopped onions, tomato, green chilies, ginger.
  3. pour 2.5 cups water. add turmeric powder and asafoetida. stir well.
  4. pressure cook the lentils for about 7 to 8 whistles or more till they become soft and creamy. mash the dal with a wired whisk or with a spoon and keep aside. Adjust to desired consistency.
  5. once the desired consistency is reached, add cream, garam masala powder, crushed kasuri methi, chopped coriander leaves and salt. switch off the fire. mix well so that everything combines uniformly. check salt before you add the tempering. if less than add more salt.
  1. dhungar method:
    1. next is the dhungar method of flavoring the dal with the smoky fumes of burnt charocal. for this with the help of tongs or on a grill pan like shown in the pic below, place the a small piece of charcoal. burn the charcoal till it becomes red hot. please use natural charcoal for this method.note that this is an optional step and you can proceed directly to the tempering method.
    2. place the red hot charcoal in a small steel bowl.
    3. pour about ¼ tsp of oil or ghee on the charcoal. you will see fumes emanating as soon as you pour oil or ghee on the hot charcoal.
    4. place this bowl on the dal.
    5. cover the cooker or the pot with a lid and let the dal get infused with the charcoal smoke. just keep for 1 to 2 minutes. the more you keep. the more smoky the dal will become. remove the bowl carefully with the helps of tongs and cover the dal. keep aside.
    preparing the tempering/tadka/chaunk:
    1. next heat oil or ghee or butter in a small pan. first add cumin seeds and crackle them. the cumin should get fried and not be raw but don’t burn them.
    2. now add red chilies, asafoetida and chopped garlic. let the garlic brown and the red chilies change color.
    3. lastly add red chili powder. stir and switch off the stove. make sure to fry the tempering ingredients at a low flame, so that you don’t burn them.
    4. pour the entire tempering along with the oil/ghee into the dal.
    5. you can mix the dal or serve the dal tadka with the tempering on top it. garnish dal tadka with coriander leaves. serve dal tadka hot with steamed basmati rice, jeera rice or with rotis or phulkas.

Brownie Cups

IMG_3731

Love brownies, absolutely adore them. So easy to make and super delicious to taste. Now I have tried quite a few brownies variants from Double chocolate to Nutella to Mocha and DDL.

IMG_3723

This time decided to try a different shape to the brownie and made cups with assorted toppers. Quite an interesting way to serve it to your guests

IMG_3725

You can get innovative with your toppers. Some of the toppers used here are whipped cream, chocolate ganache, icecream and DDL

IMG_3724

Ingredients

Morde Dark Chocolate – 220 gm
Amul Butter- 110 gm
Eggs- 3
Brown Sugar- 210 gm
Flour- 80 gm
Cocoa powder- 10 gm
Vanilla extract- 1 tsp


  1. Melt the butter and chocolate together. Cool.
  2. Add the sugar to the chocolate mix and whisk.
  3. Add the eggs, one by one, whisking between each addition. Add the vanilla and give another quick whisk.
  4. Sieve the flour and cocoa powder and add the dry mix in two increments. Do not over-mix.
  5. Pre heat the oven to 180C.
  6. Take a cupcake tray and either spray the tin with oil or grease cupcake liners and place them in the tray.
  7. Pour the batter 2/3 full in the moulds and bake at 180 C for 25-30 minutes.
  8. The tops should be firm and a toothpick inserted in the centre should come away with just a little stickiness.
  9. Grease the underside of another cupcake tray. Remove the tray from the oven and immediately press the underside of the empty greased tray on top of the brownie tray.
  10. Keep a weight on the tray and leave the brownie cups to cool.
  11. Once cooled, fill the cups with your choice of toppings.