Sabudana and chana dal Payasam

payasam

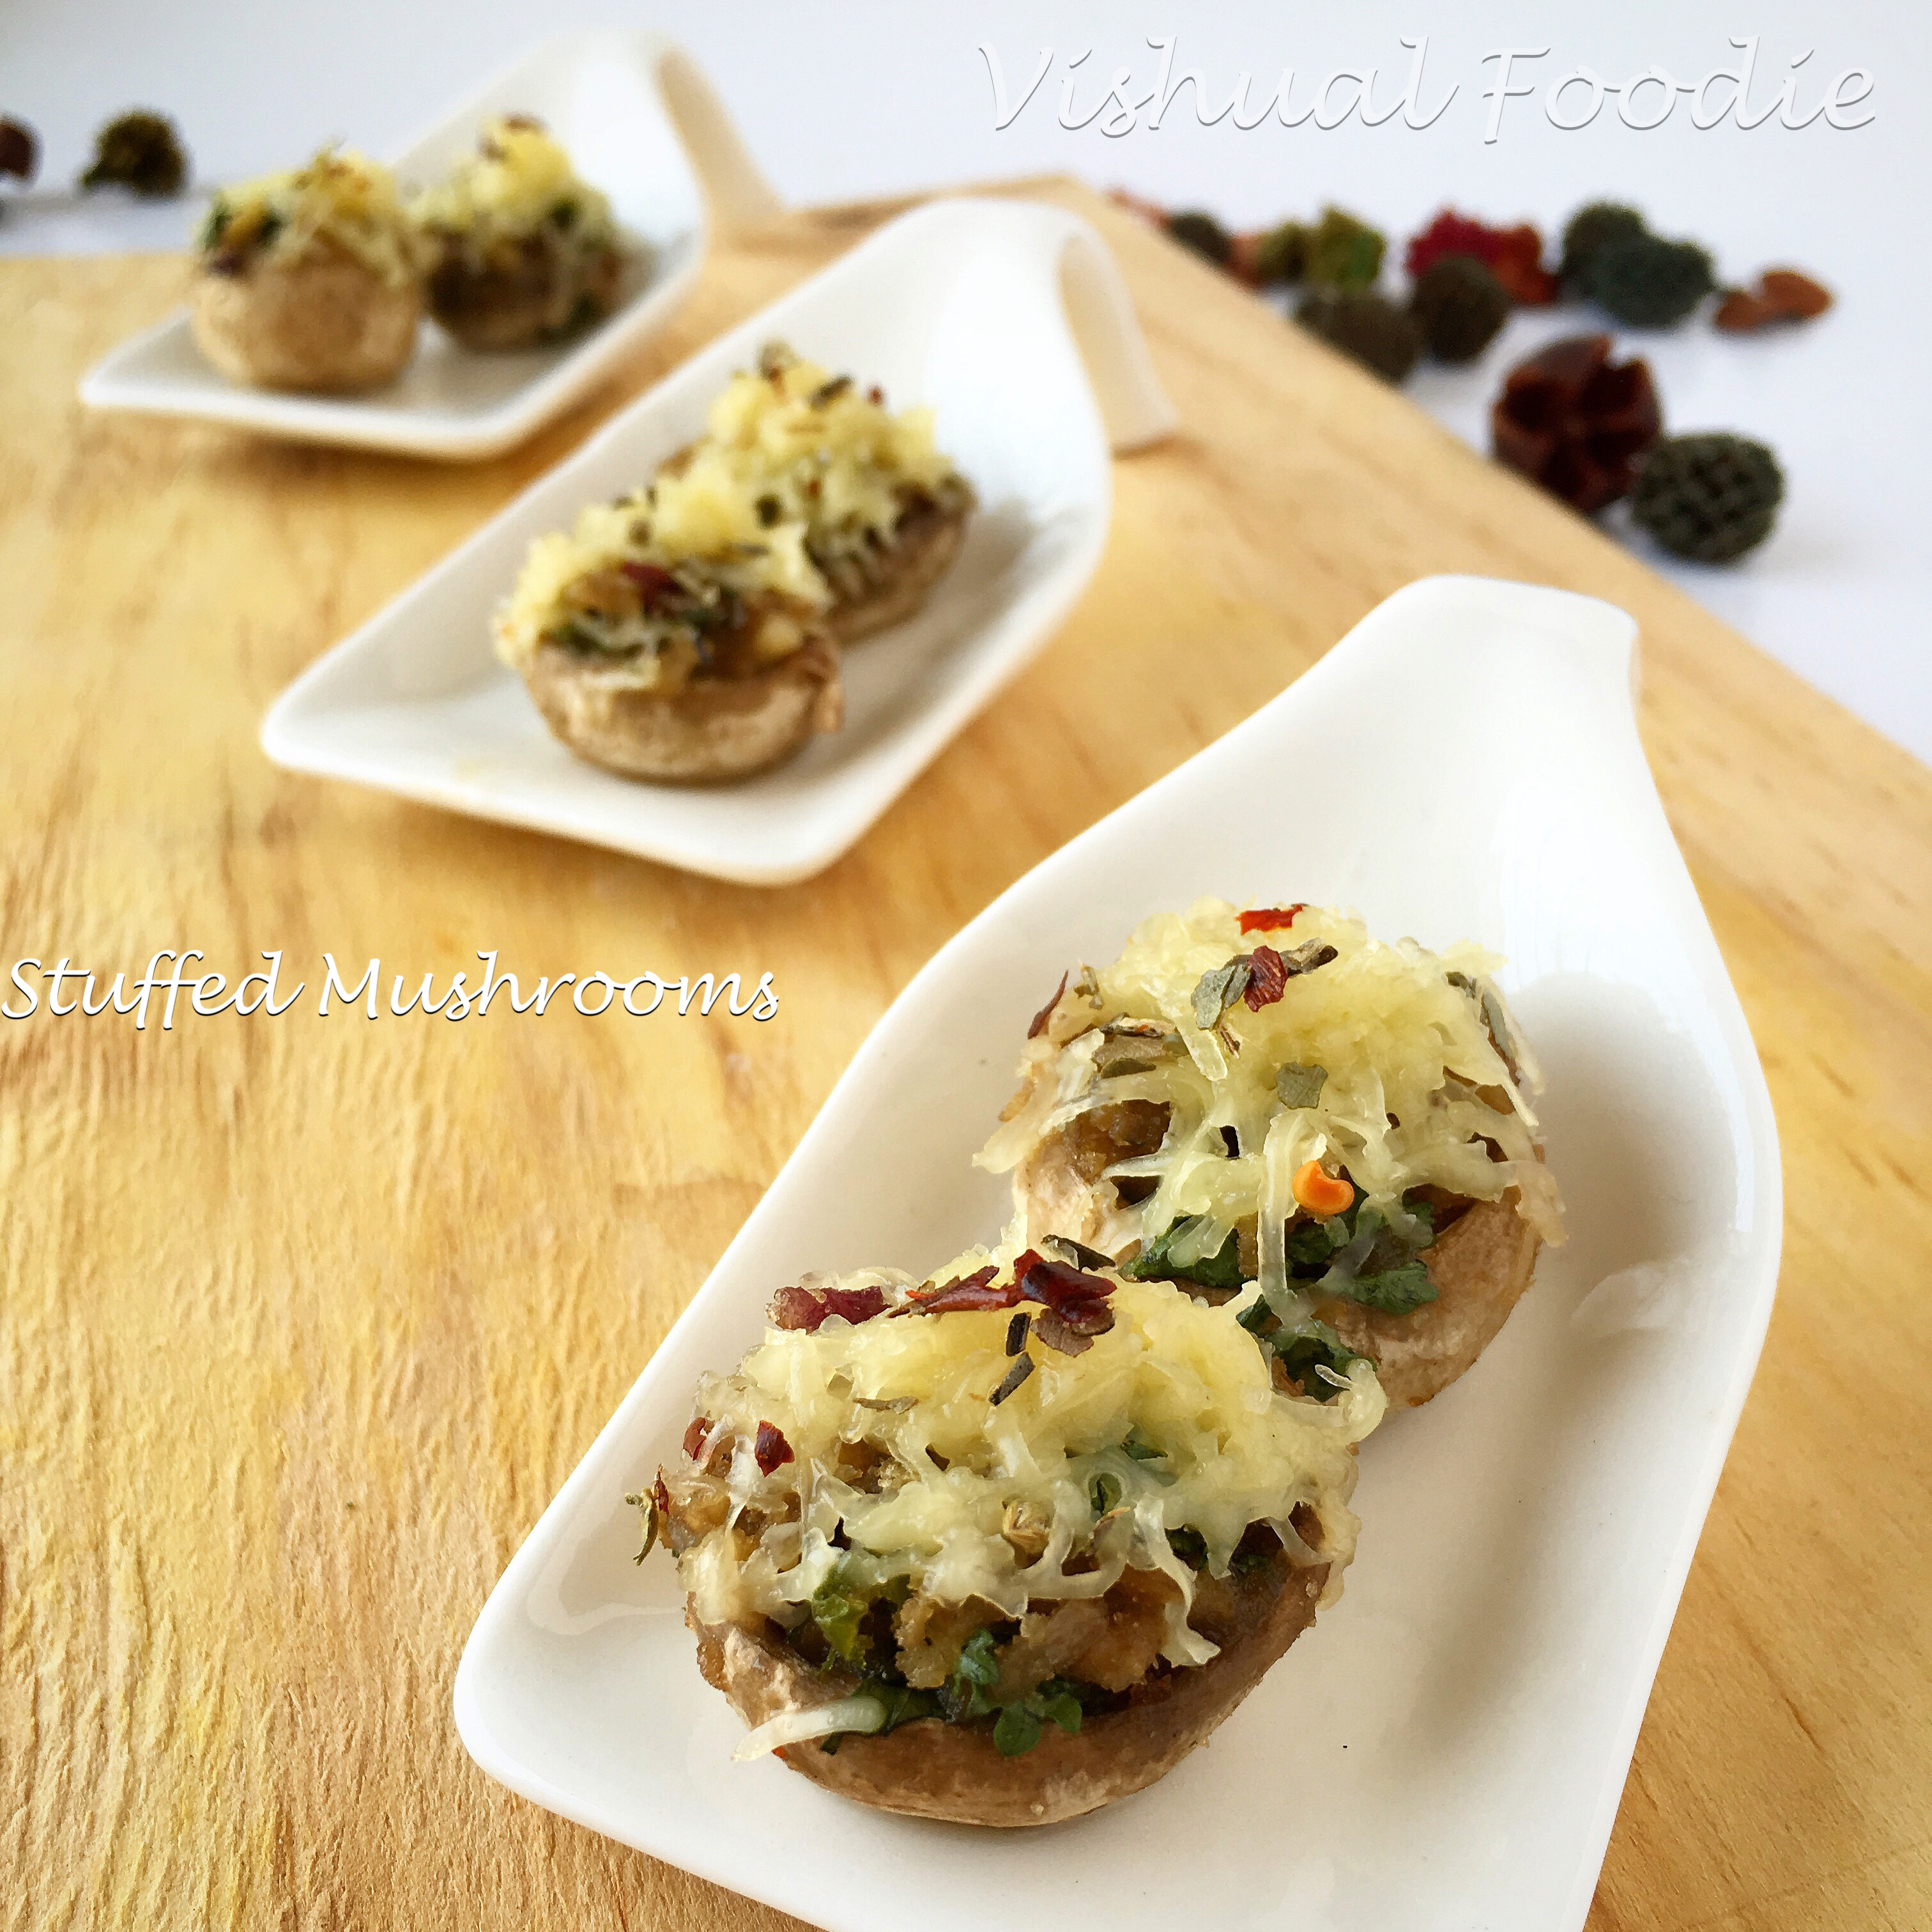
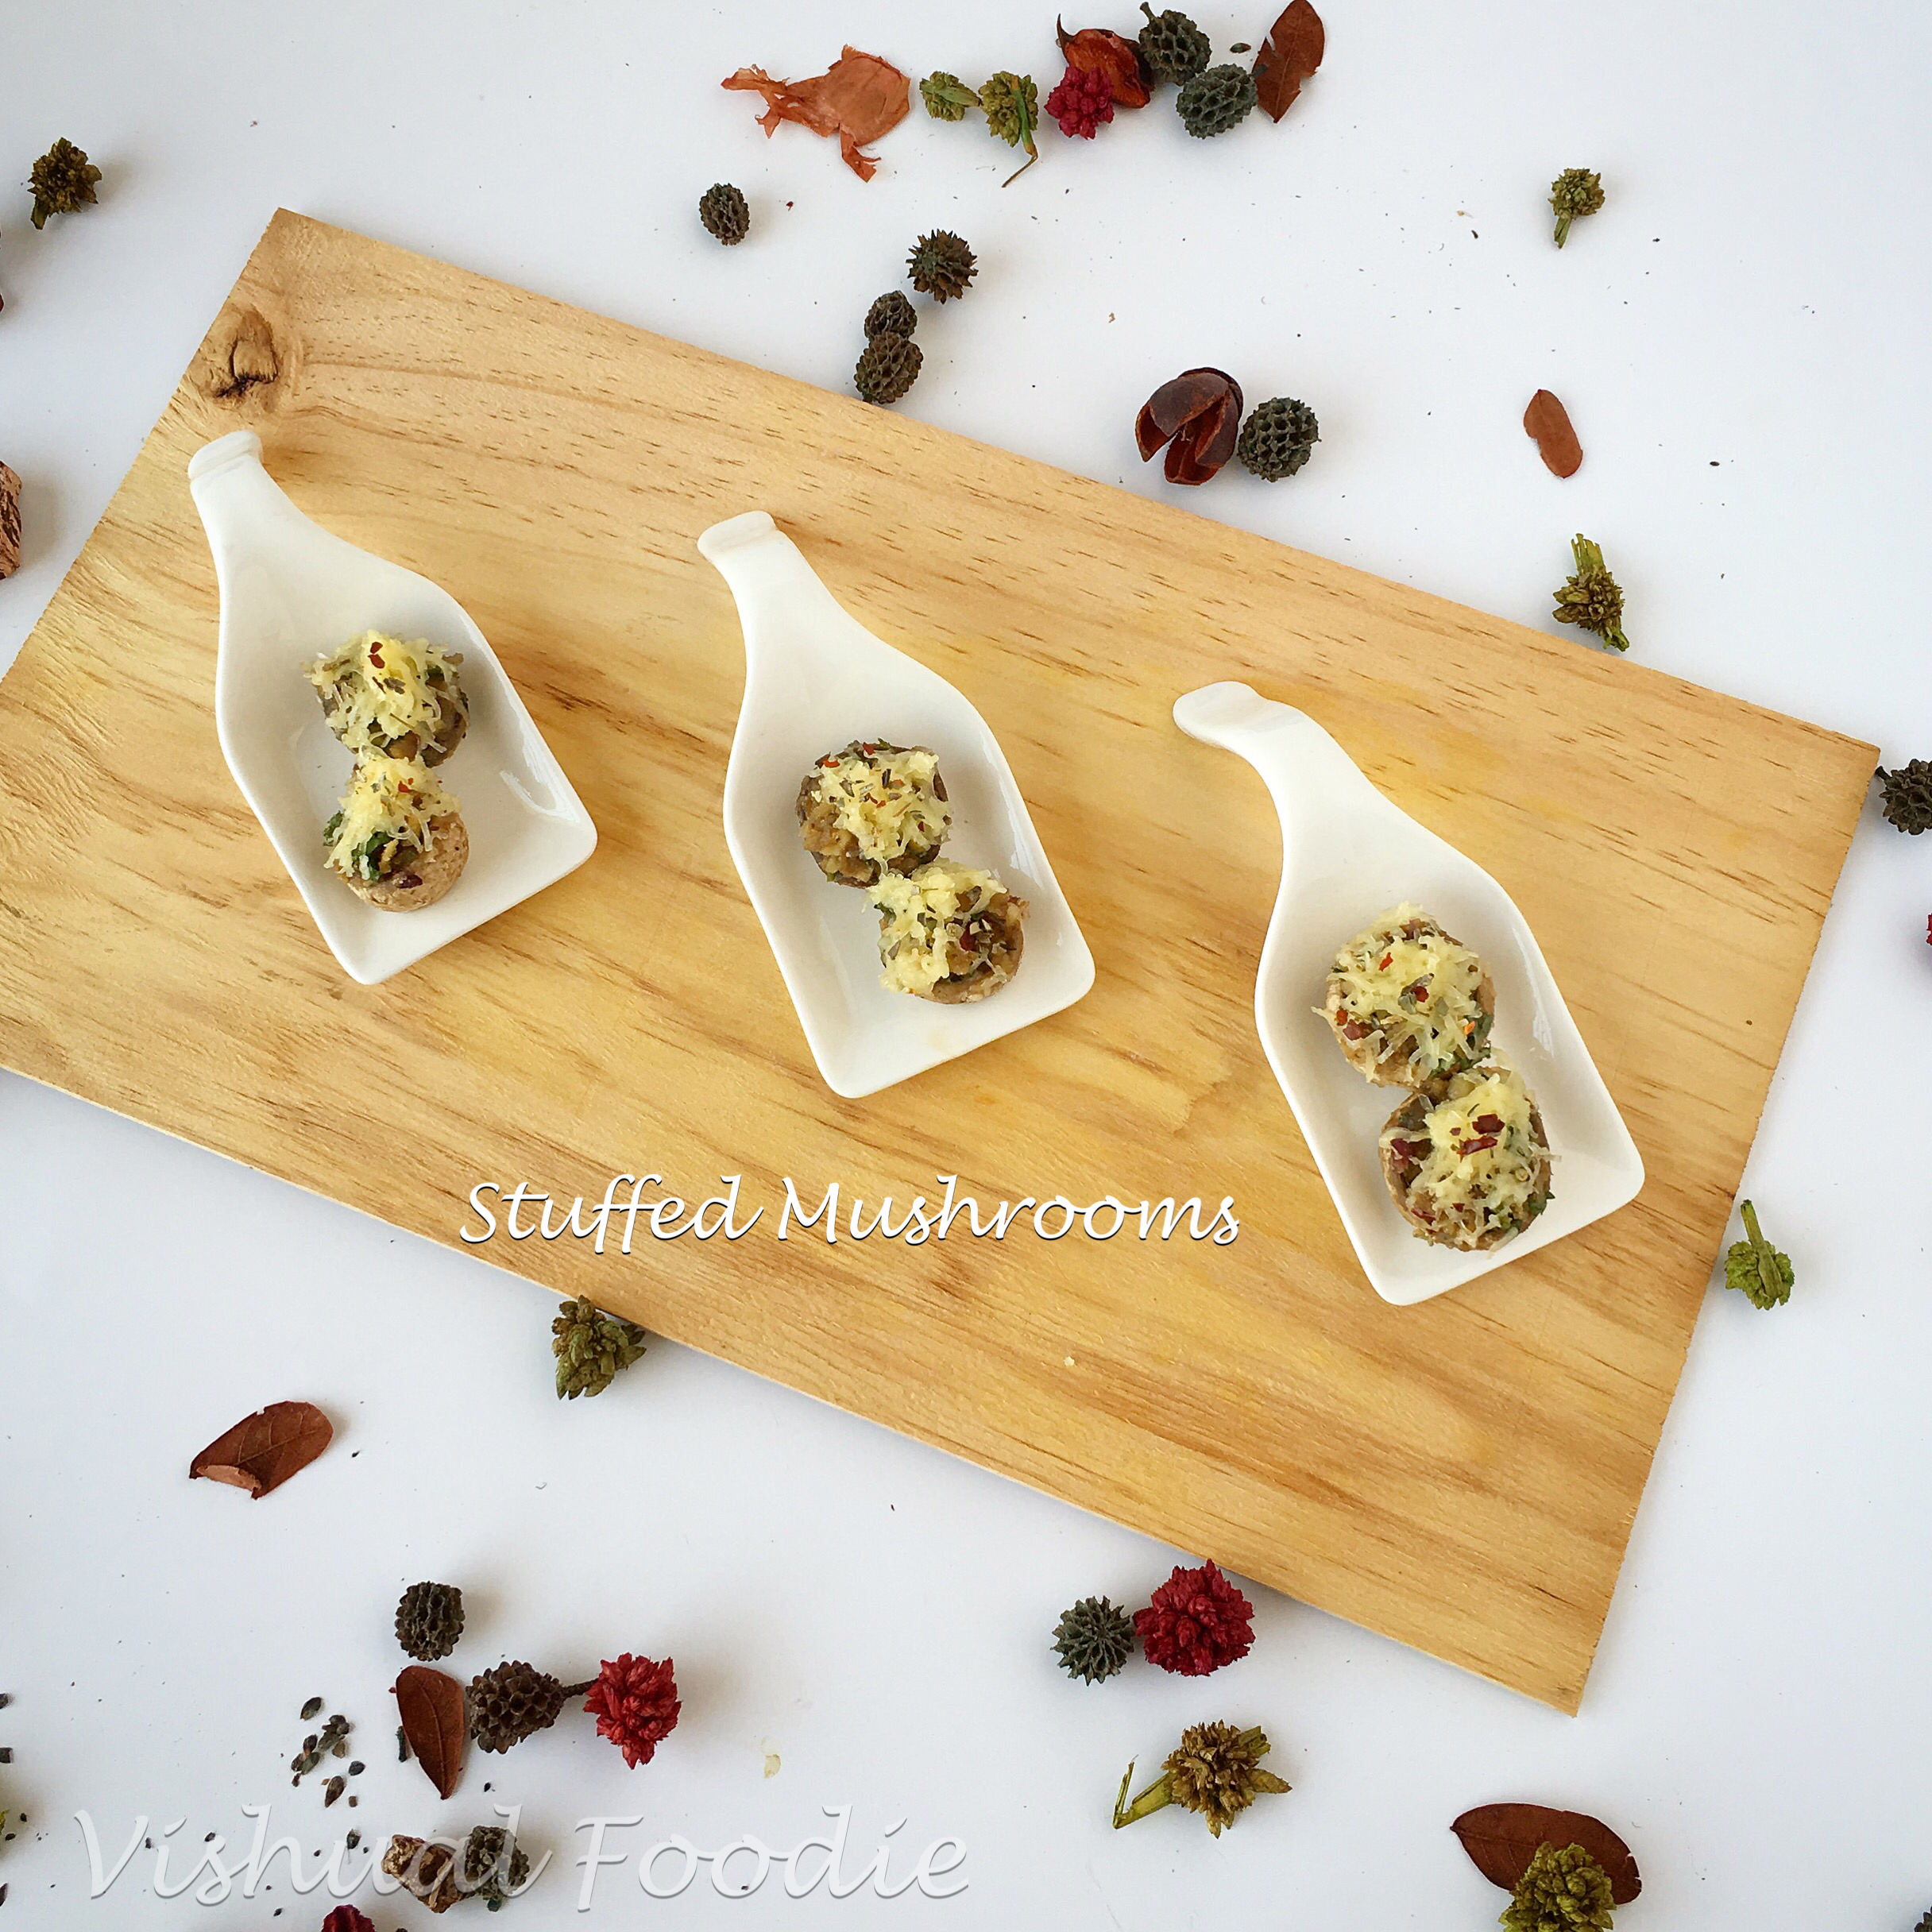
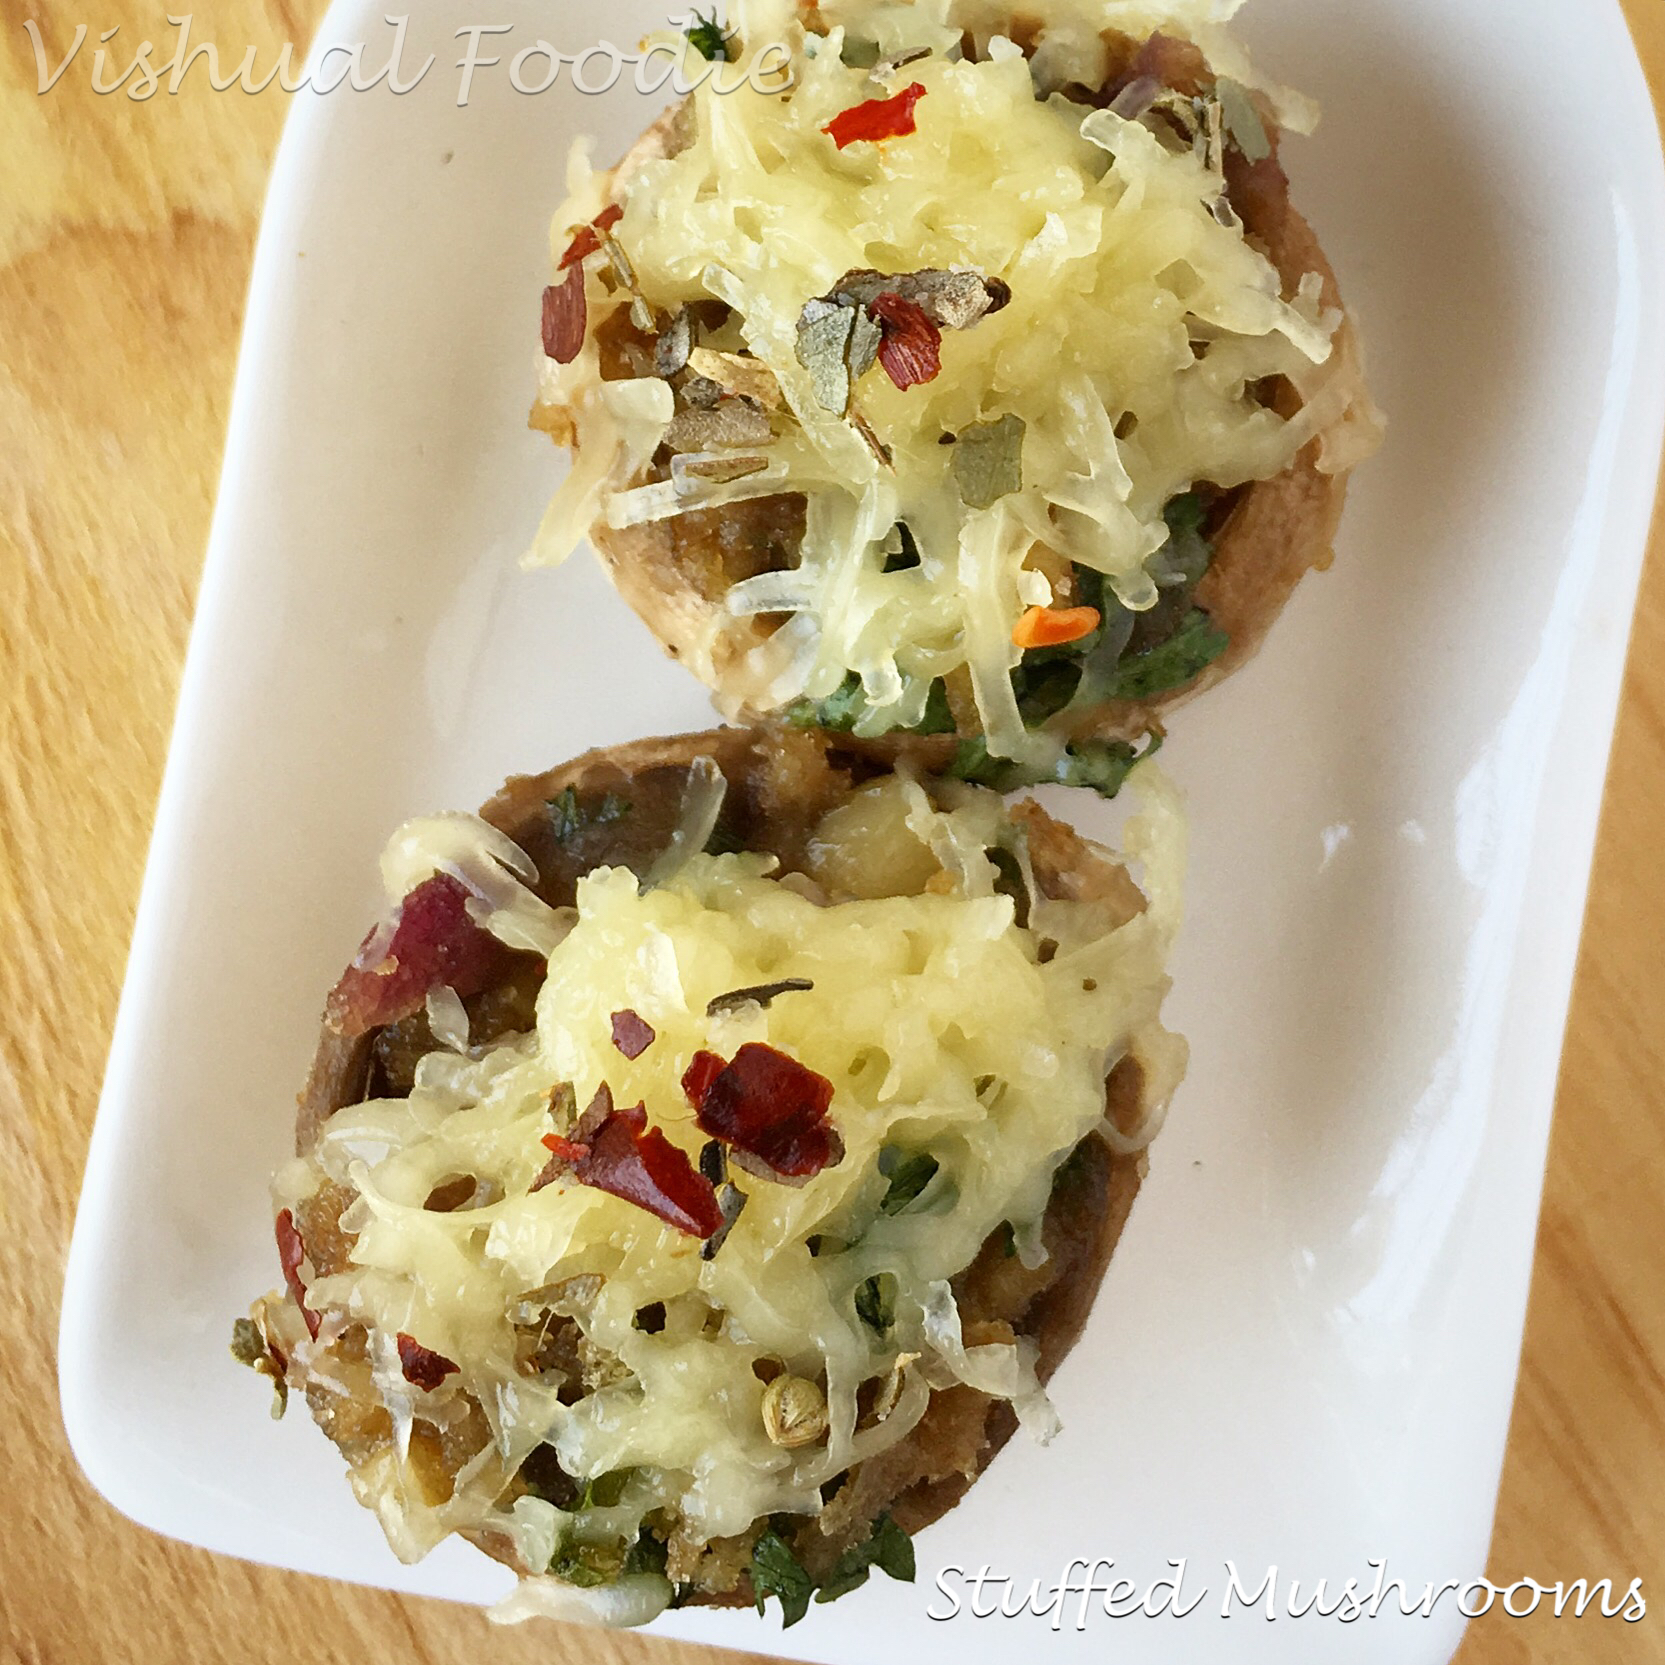
Yaay. Vishual Foodie completes a year today. Time to celebrate

So after quite a bit of nagging from my friends, a year ago I started this blog. Many helped me with all the technical know how and edged me on to expand my food horizons


Some recipes are from my family pitaara and some from various blogs. Some I have developed myself and the discovery process has always been exciting.

IMG_0456 1

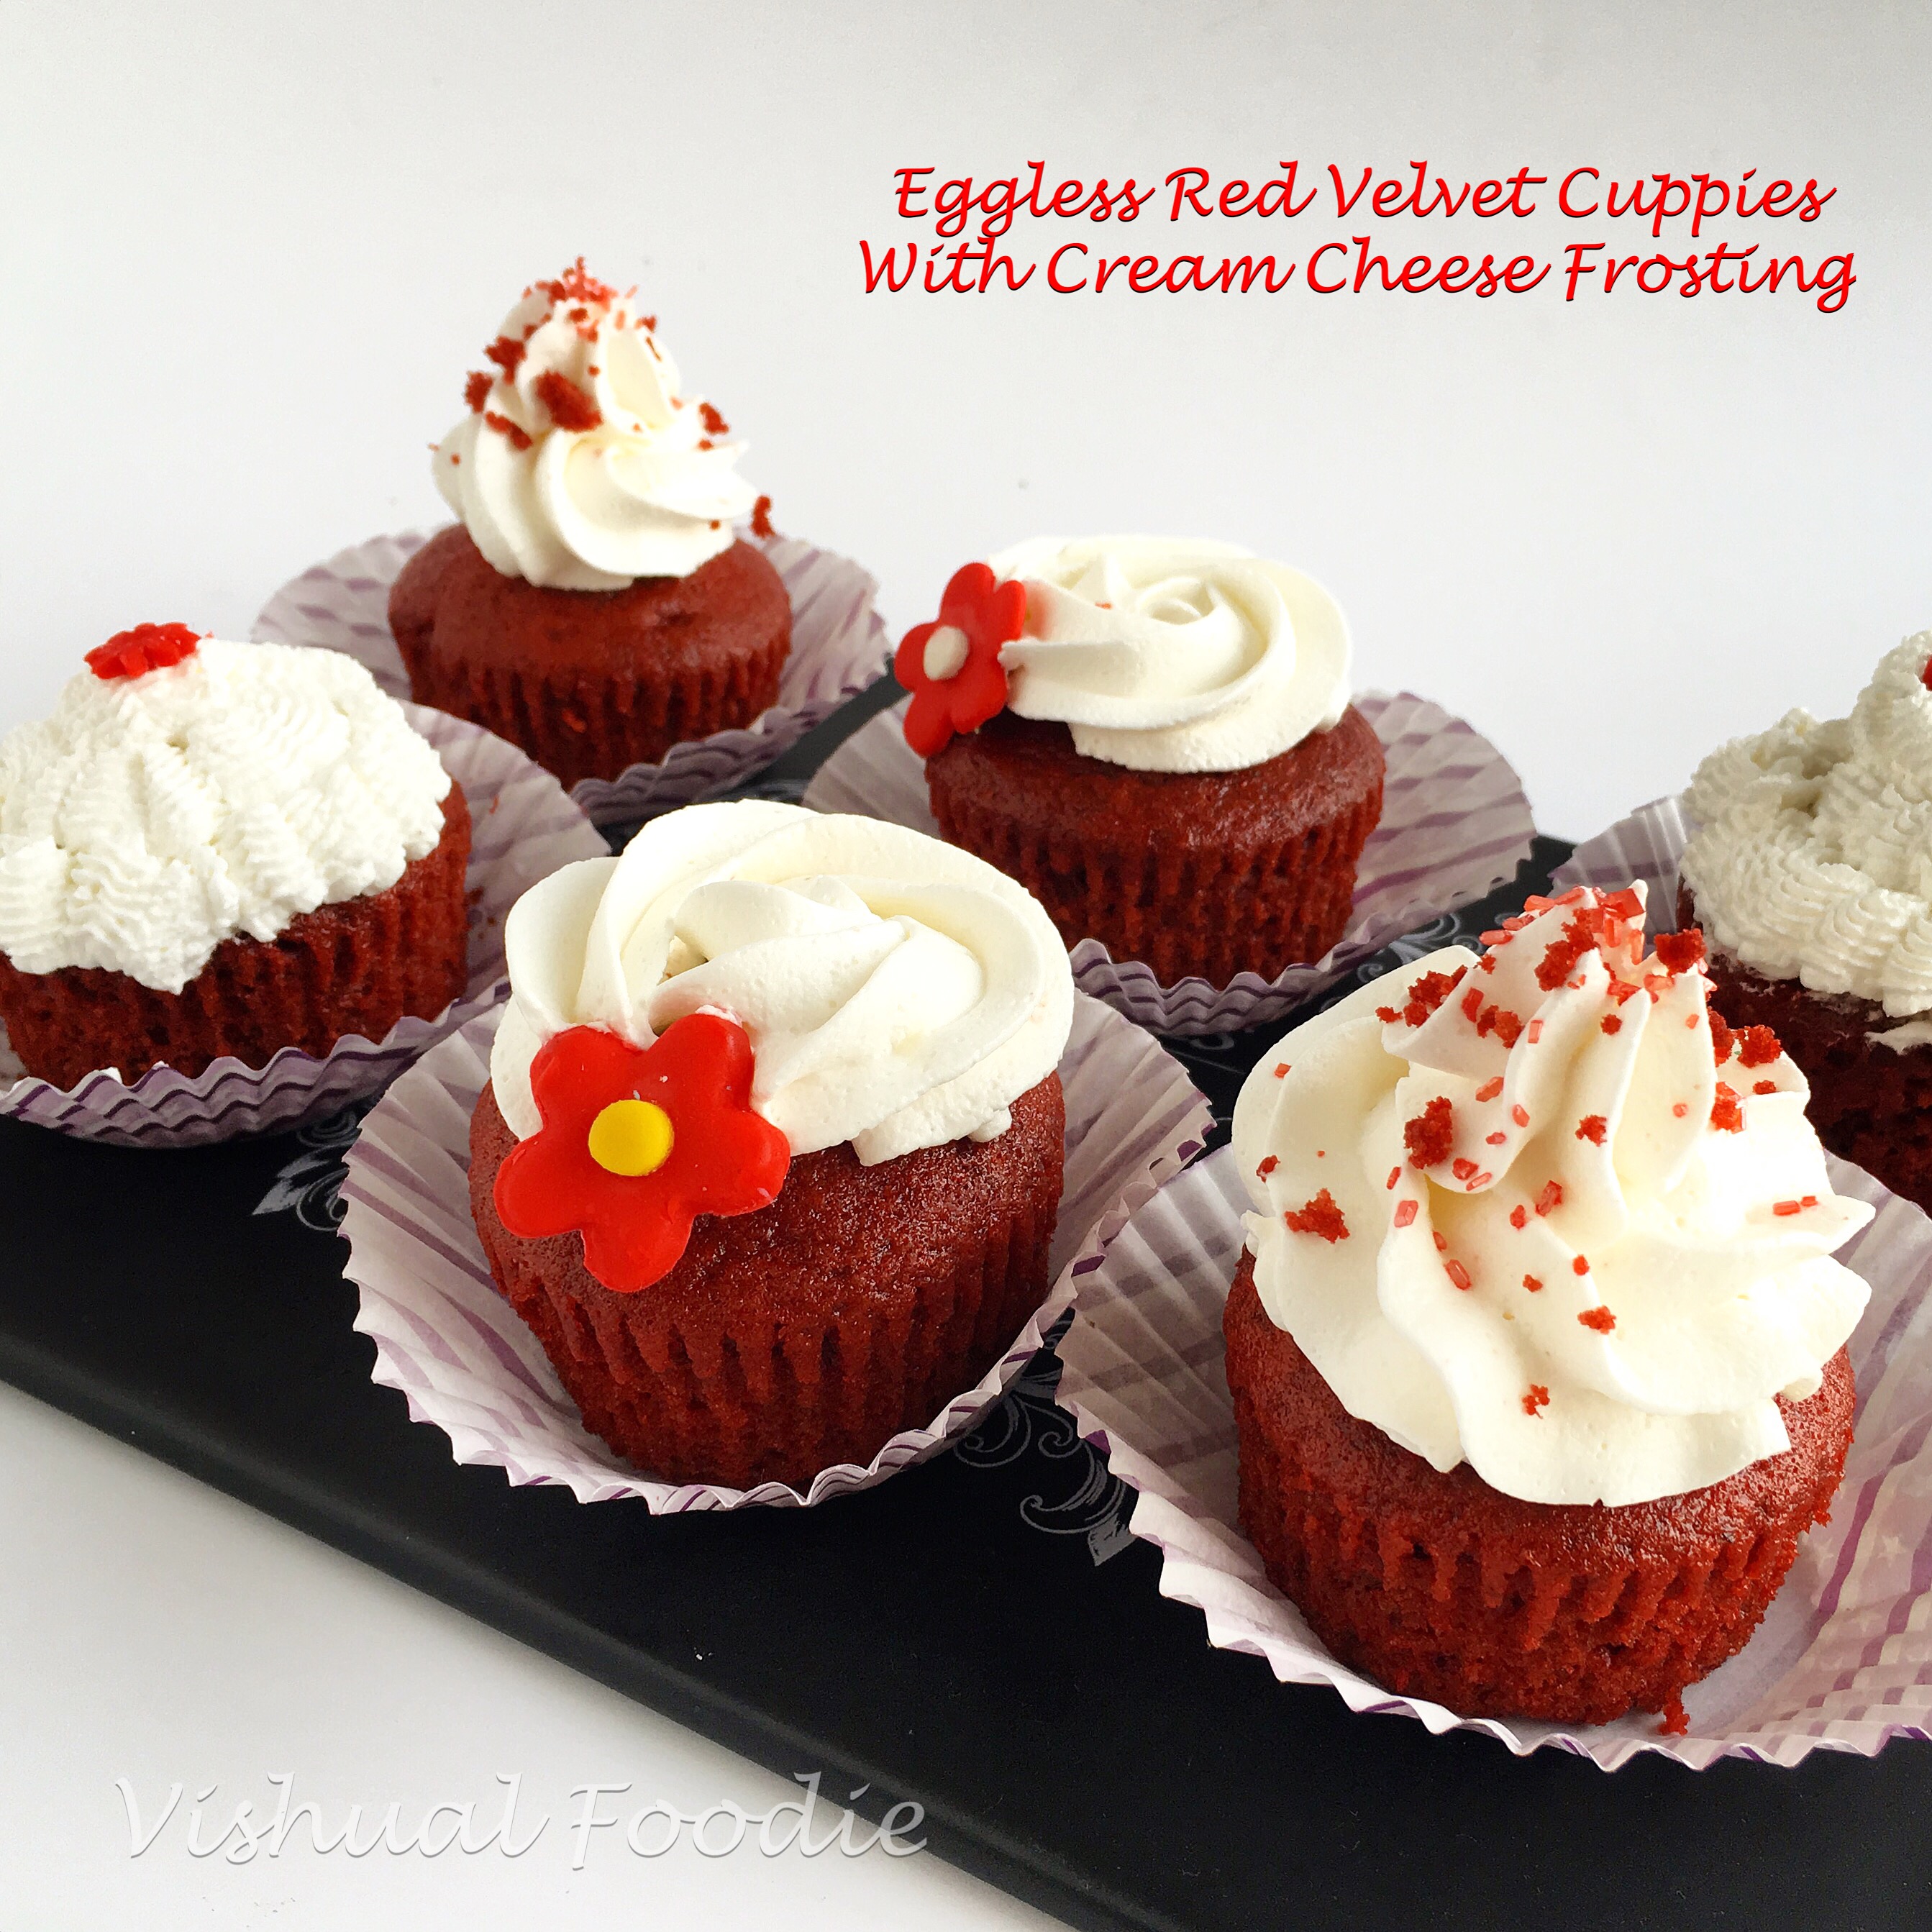
I was confused as to what to make to commemorate by blog’s anniversary and my mind would just draw a blank. I finally thought, let me go to my roots and make a dessert as any celebration needs a Meetha. Asked mom for the sabudana and kadelesalay payasam (sago and chana dal kheer) that everyone seems to love.

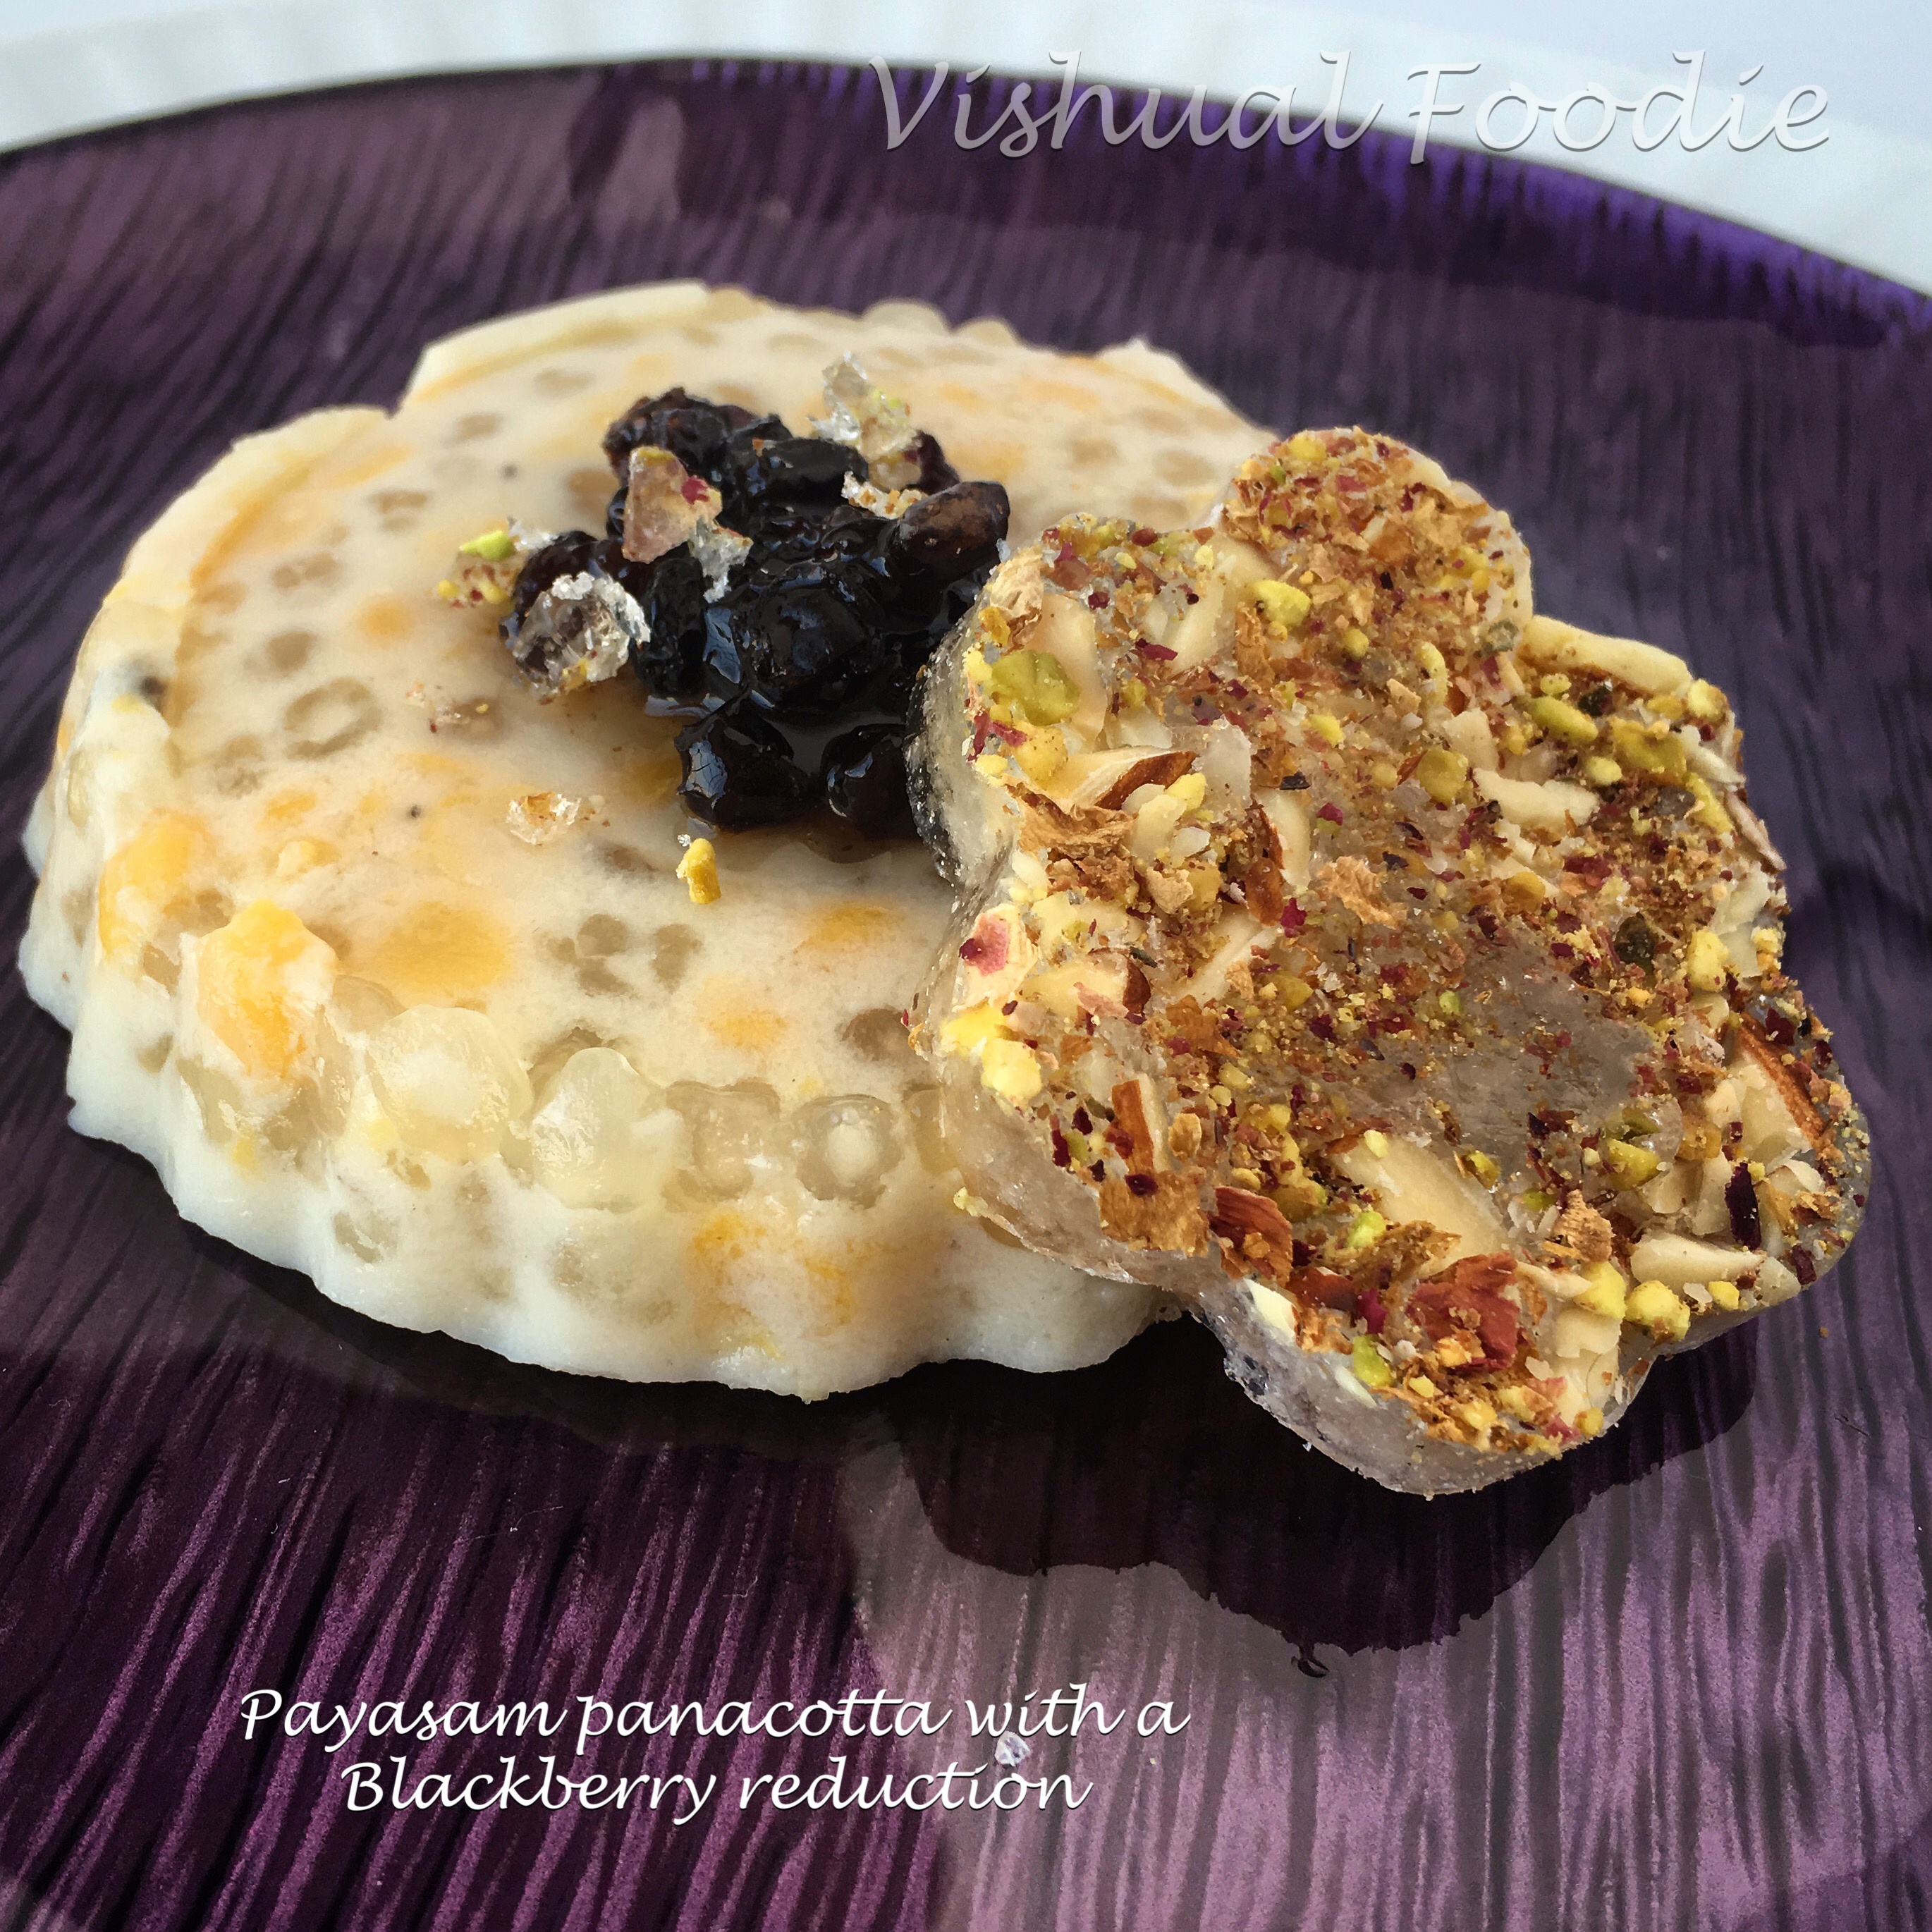
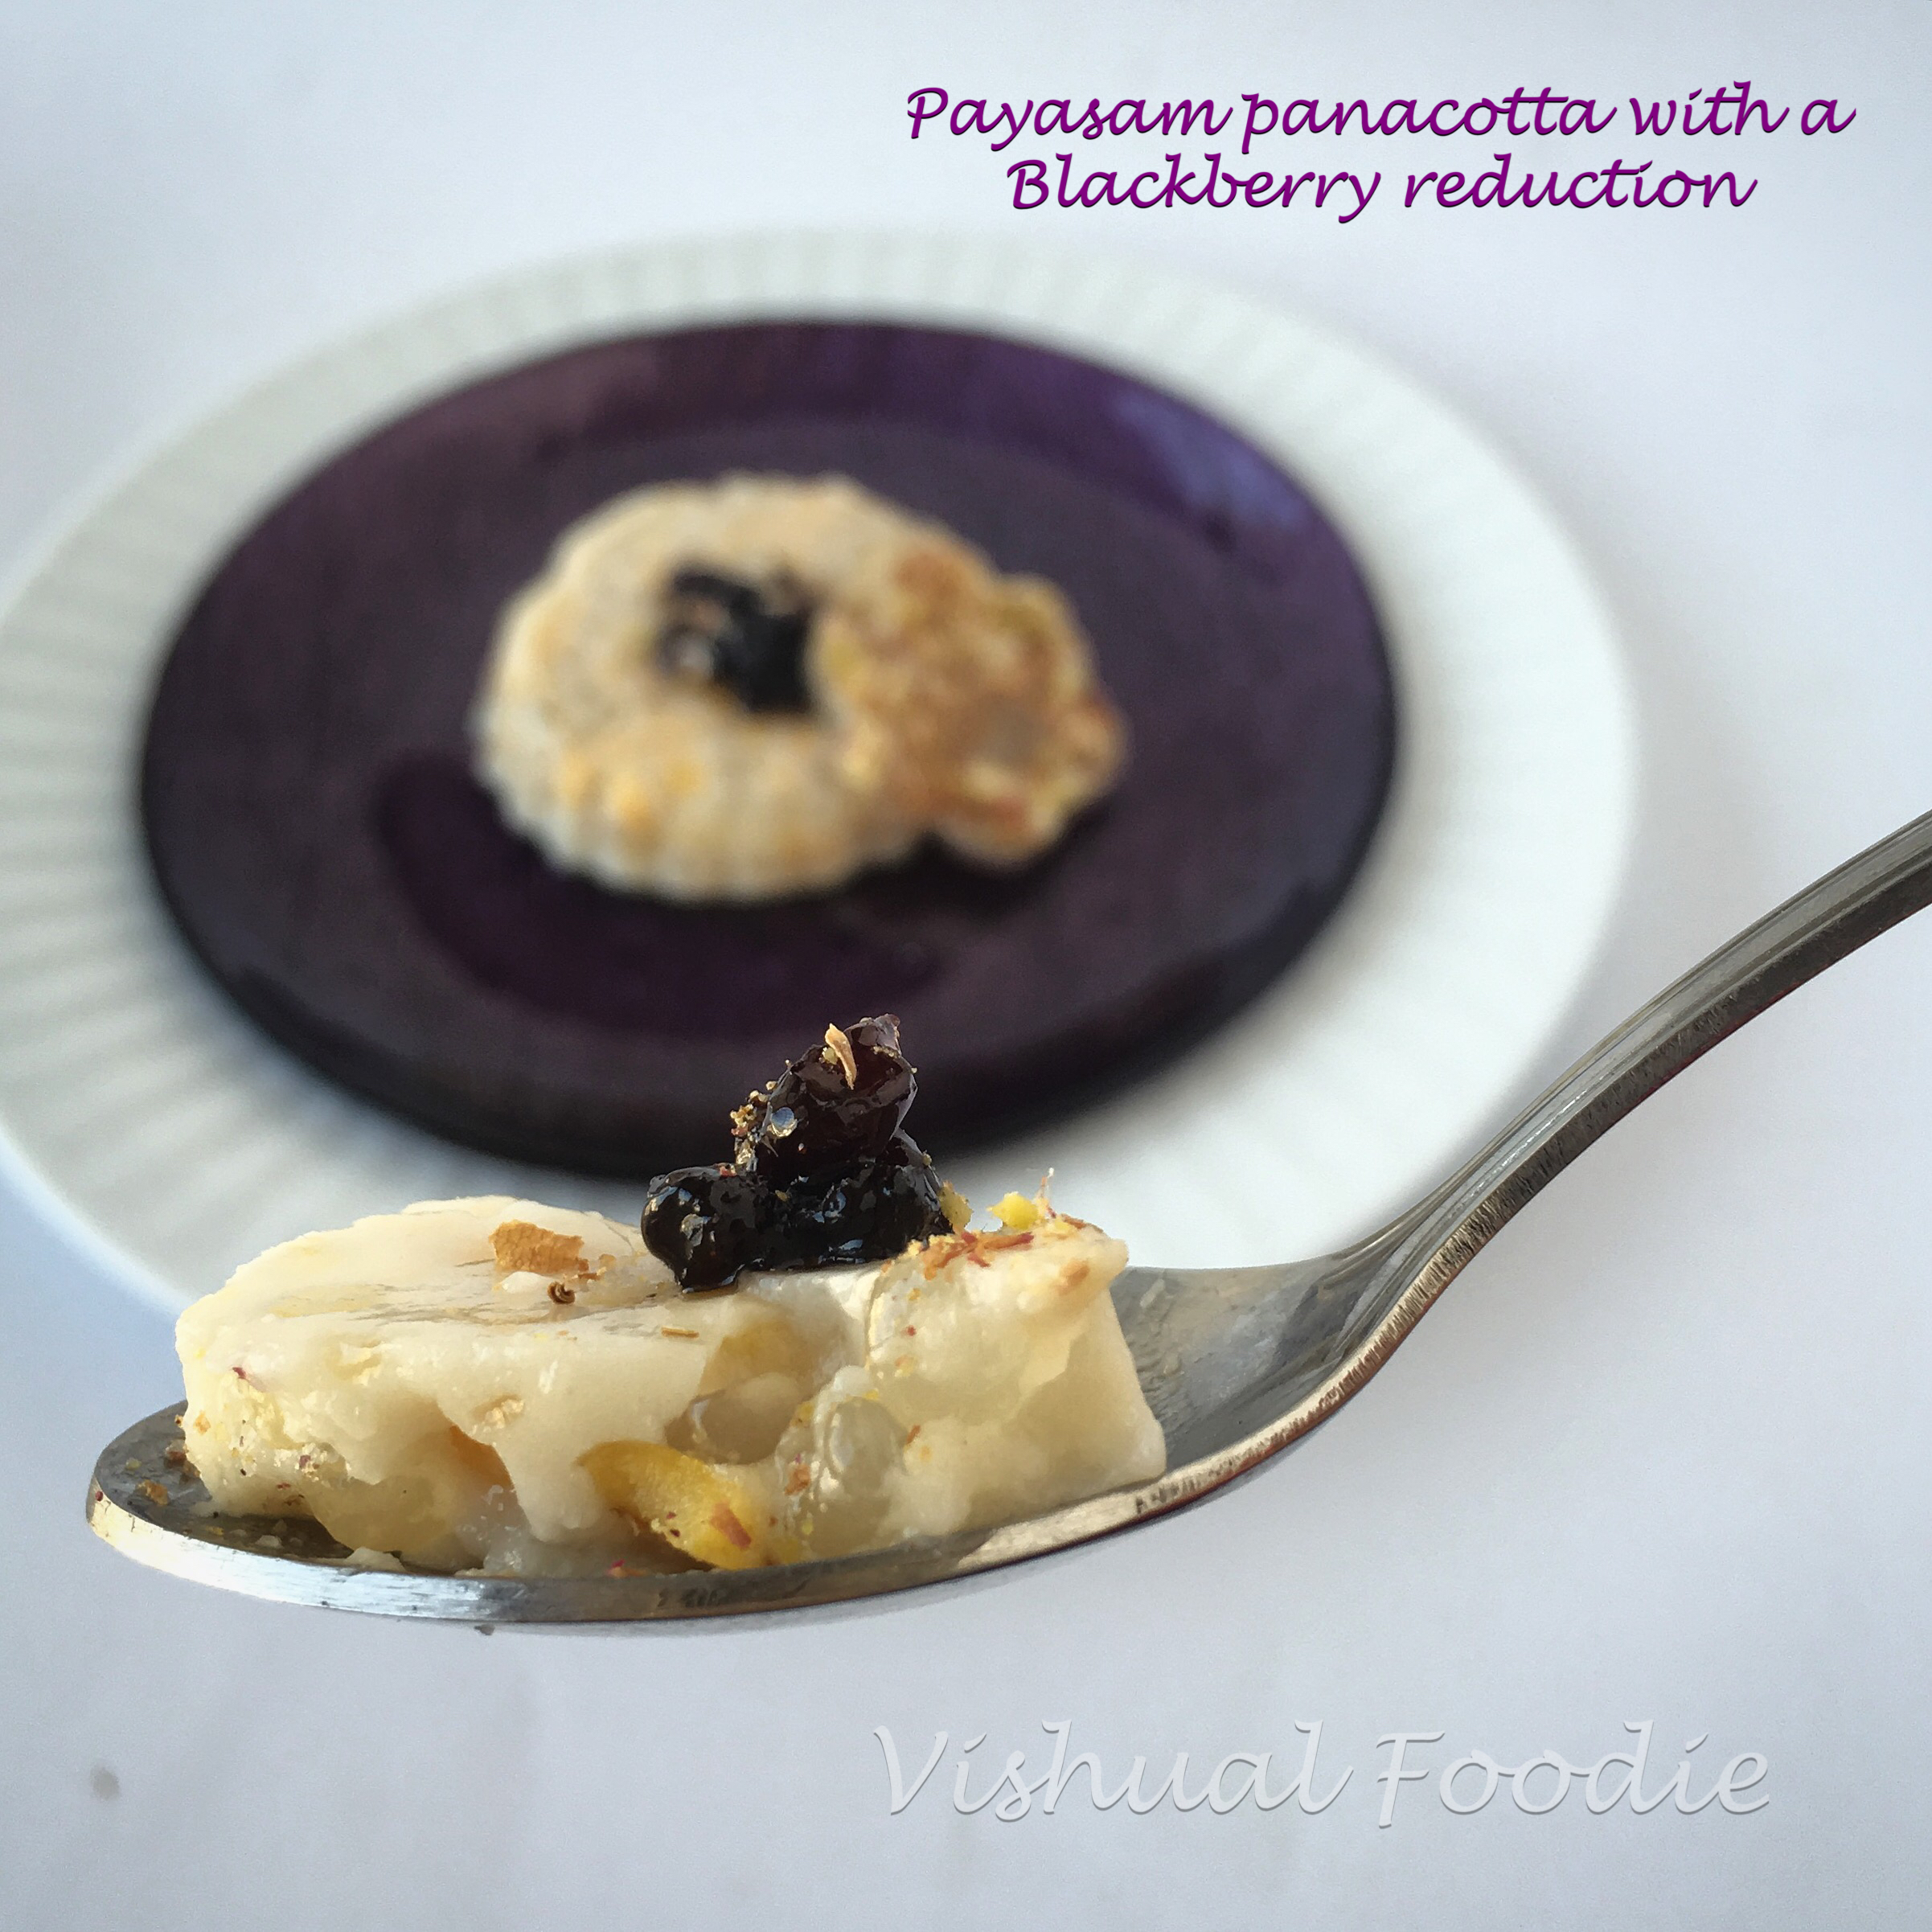
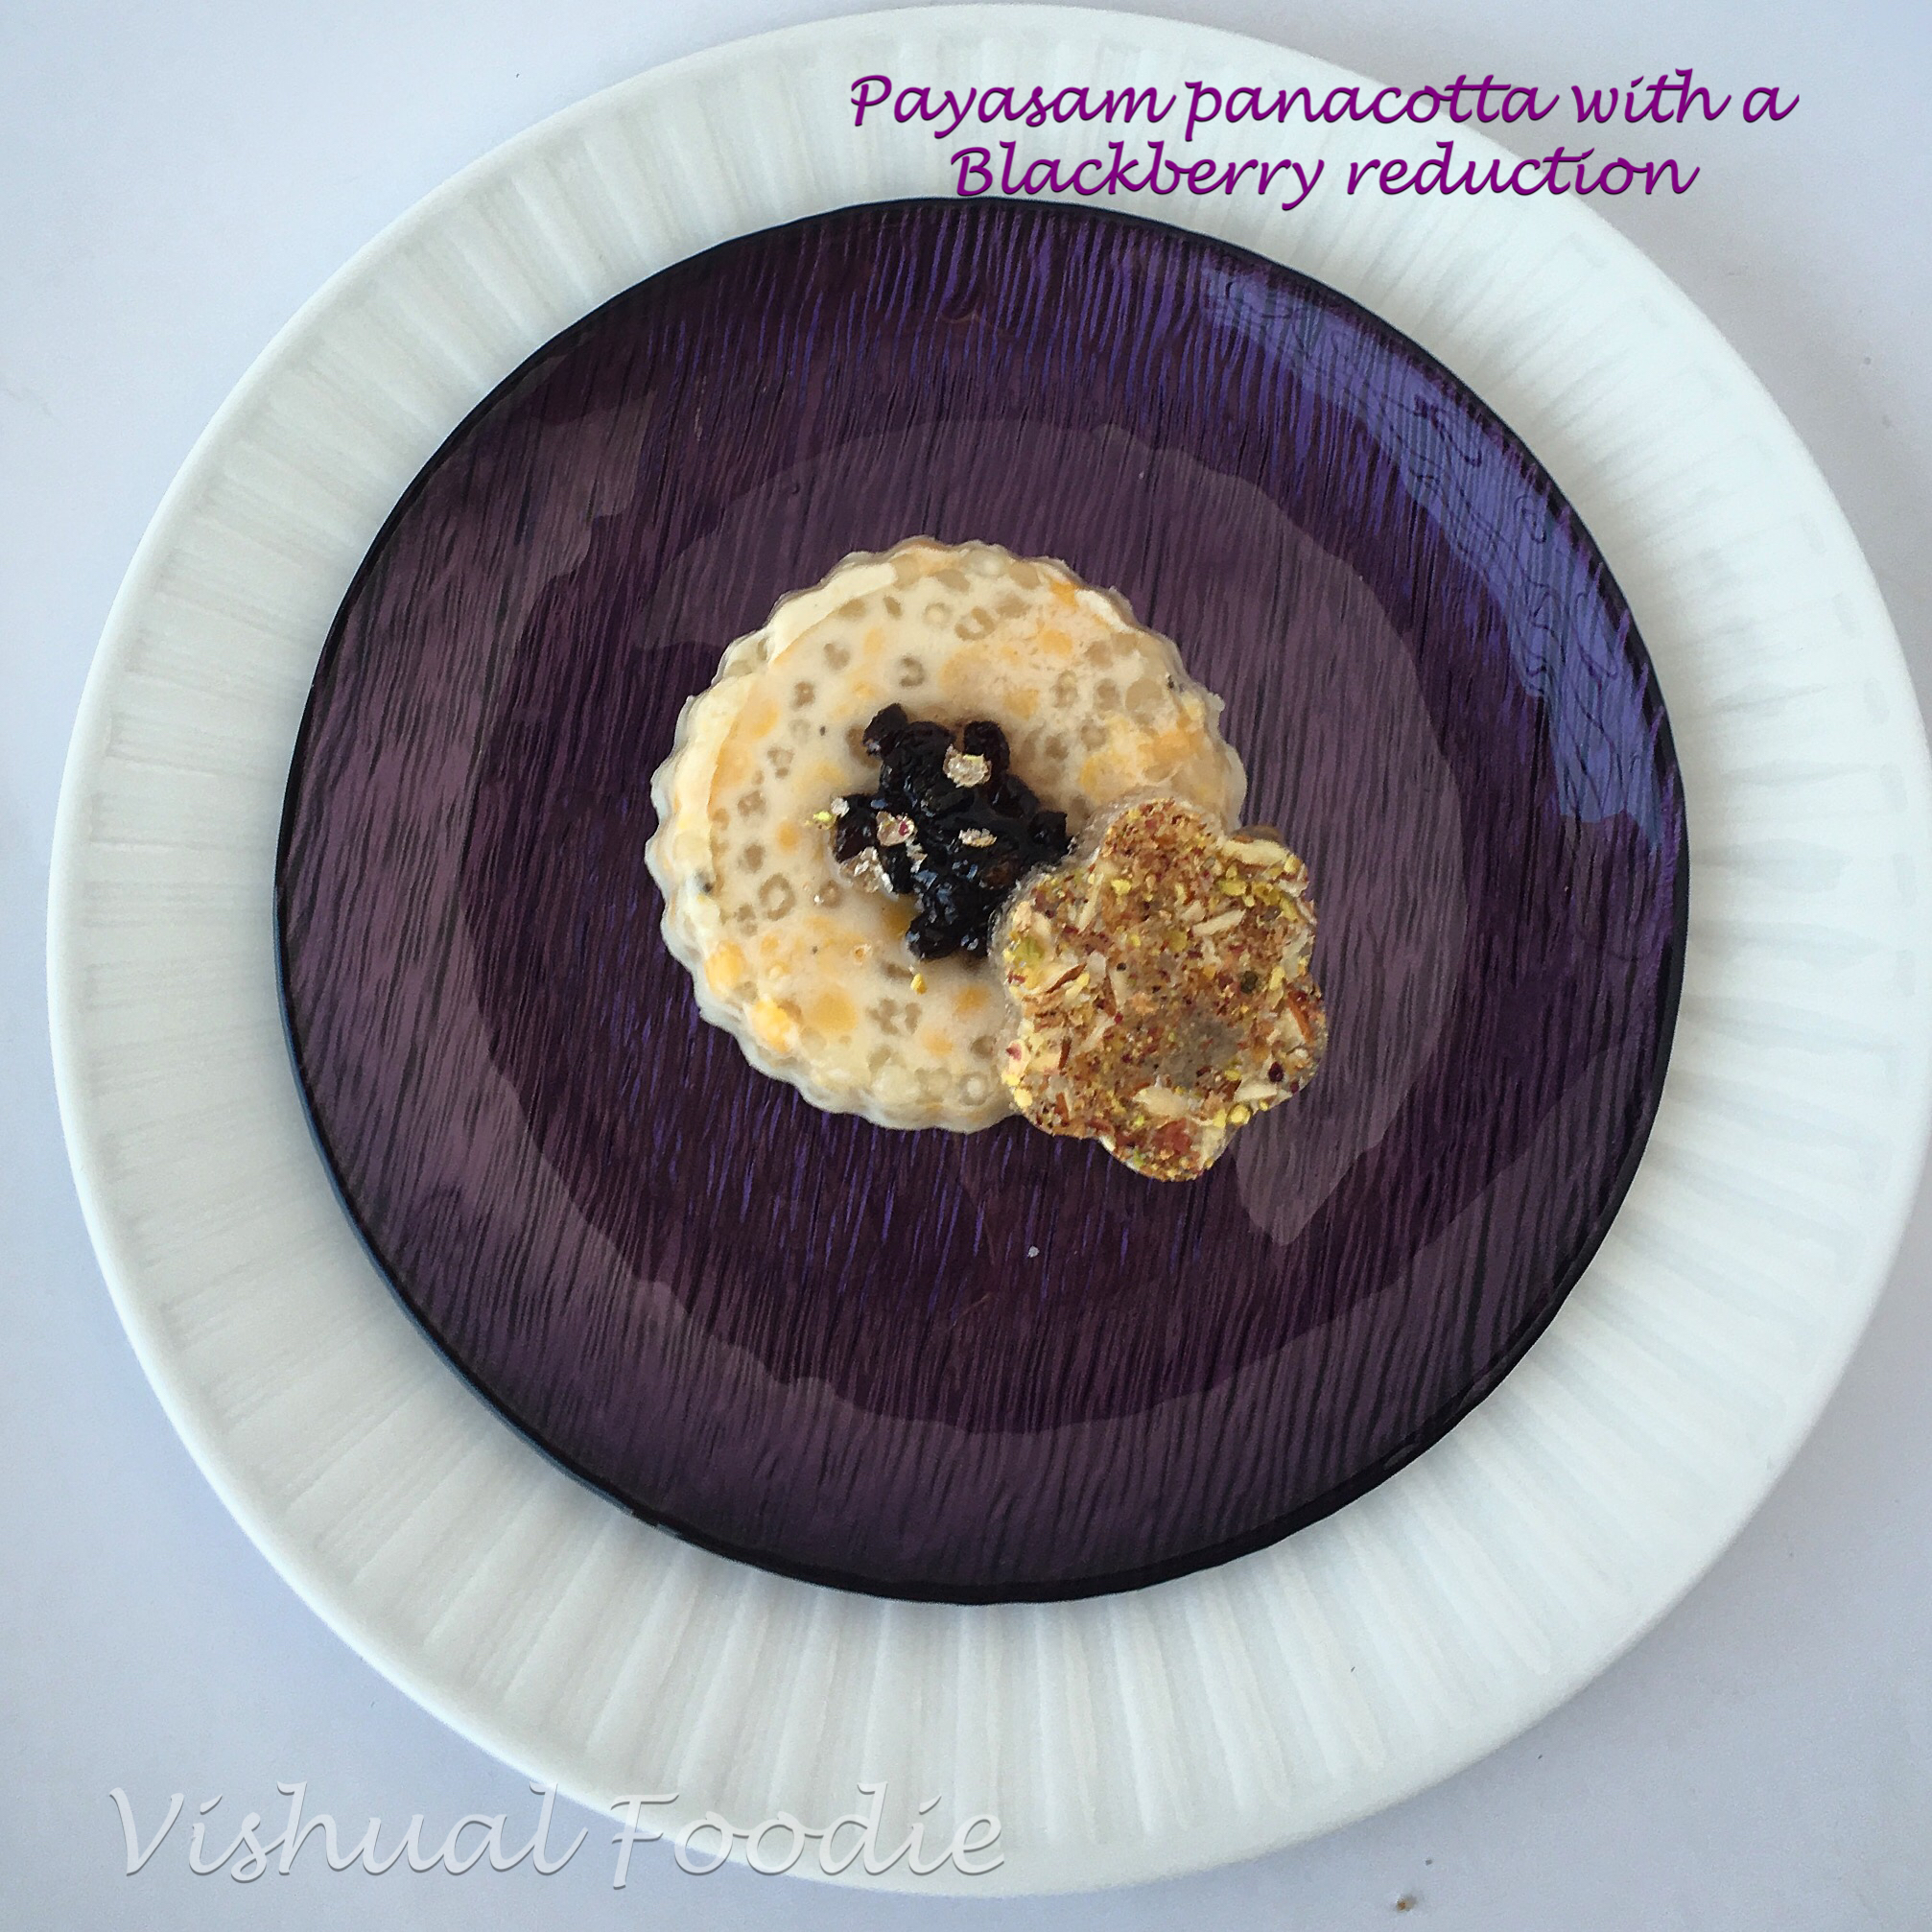
I made it as per her recipe but somewhere deep down I was not excited. Then I remember a conversation I had with a friend Vivean about recreating this dish. So went ahead and turned the payasam into a panacotta. Still something was missing, so made a blackberry reduction to go with it. Now for the crunch and that was the almond and rose praline. And voila an exotic dish is ready.

IMG_0458 1

PAYASAM

Ingredients

1 cup sabudana

1 cup chana dal

1 big coconut

3/4 cup brown jaggery ( or as per sweetness required)

5-6 crushed cardamom

15 raisins

10 cashews

  1. Boil the chanadal in a pressure cooker, 1 whistle and 3-4 mins on slow gas. When cool, drain water and sprinkle little salt.
  2. Grate the coconut and get the extract milk by blending in the mixer. Squeeze out the first batch of milk and keep aside, do this 3 times, keeping all 3 milk extracts in different bowls.
  3. Soak the sabudana in the 3rd batch of coconut milk which is the thinnest for 20 minutes,
  4. Boil this milk and sabudana on a low gas, remembering to stir as the bottom can burn easily.
  5. When the sabudana turns translucent add the chana dal and jaggery. Remember to not let it get too thick
  6. Add the 2nd coconut milk extract and cardamom and keep stirring.
  7. At the end add the dry fruits and the first batch of extract.
  8. Shut the gas and mix well.

The panacotta and blackberry reduction is my special twist which will be my little secret 🙂

The prettiest cake I have made

This cake needed to feature on my blog. So here it is. A chocolate cake filled with fresh strawberry mousse and decorated with hand piped coloured ganache roses.


IMG_9820 1 IMG_9819 1 IMG_9818 1 IMG_9817

Creamy Lemon Butter Chicken

creamy lemon chicken

I am getting hooked to the food videos that come on FB. They look so easy and droolicious. Had saved this a while back with the thought that I would make it sometime.

creamy lemon chicken

My family and friends know that I love cooking and 2-3 of them sent me the link to check out. Which meant that this dish was never far away from my mind.

creamy lemon chicken

Few friends came over today, and it was a good occasion to experiment on them. Love my Guinea pigs. It’s a really interesting and yum dish though quite rich. I did have to modify for lack of ingredients but it still was finger licking.

Ingredeints

750 gms chicken legs/thighs
1 tbsp paprika
Salt to taste
1 tsp dried thyme
3 Tbsp. Amul butter
3 cloves of garlic chopped
1.5 pkt Amul cream (300ml)

1 tbsp red chilli flakes
1/4 cup Amul cheese spread
1 tbsp lemon juice
1/2 bunch spinach


  1. Season chicken thighs with salt and paprika. Keep aside for 2 hours.
  2. Melt 2 Tbsp. butter in a large pan over medium high heat. Add chicken and sear both sides until golden brown. Drain excess fat and set aside.
  3. Mix the cheese spread, cream and half cup water till blended well.
  4. Melt 1 Tbsp. butter in the pan. Add garlic, stir until fragrant, then add the cream & cheese mix, thyme, chilli flakes and stir. Bring to boil, then reduce heat to low.
  5. Stir in spinach, simmer until spinach has wilted and the sauce has thickened. Add lime juice. Adjust seasoning. 
  6. Add the chicken and this sauce in an oven proof dish. Cover with foil.
  7. Bake at 200˚C for 20 minutes. Then remove the foil and bake for another 10 minutes
  8. Serve immediately with some bread on the side
Rcp courtesy – Tasty.com (with modifications)

Butter Cookies

butter cookies

I like making something elaborate, something that requires planning and a meticulous prep. The pleasure that the final product gives me is utter bliss.

butter cookies

And then sometimes I like to keep it simple. What can I say I am a bundle of contradictions. This recipe is from Pooja Dhingra’s Big book of treats. I like the book for its easy to do recipes and simplicity.

butter cookies

These cookies are so crisp and buttery, they just melt in your mouth. Its without eggs too making it more universal. U can dress it up as per your pretence. I have just dipped them in chocolate and smothered with thousands and ones.

butter cookies

Ingredients

200 gms Amul butter

125gms castor sugar

1 tsp vanilla essence

250gms maida

100gms Morde dark compound

sprinkles of your choice


  1. Whisk together butter, sugar and vanilla essence till its soft and fluffy.
  2. Sift the flour separately and fold it in. Use a spatula and not a whisk.
  3. Cling wrap the dough and refrigerate for 2 hours.
  4. Preheat the oven to 165C and place silicon mats on the grill.
  5. Make small balls and place them at a distance from each other on the mat.
  6. Bake for 13-14 mins or till edge starts browning.
  7. Leave in the oven for 5 minuters then take them out on a rack to cool.
  8. Heat chocolate for about 1 and half minute in microwave or till melted.
  9. Dip the cooled cookies in the chocolate and cover with sprinkles of your choice.
  10. Place them on baking paper to set.

Pasta with a charred red pepper sauce

bell pepper sauce

I call myself a foodie but I also have a long list of food I hate. My friends and family have been given that long list to memorise as it seriously upsets me when they don’t remember what I hate. 😂😂😂. Yeah. I am a fussy foodie.

bell pepper sauce

On the list, besides a million other things is Capsicum and Bell Pepper. I absolutely detest it in any preparation and religiously remove it or refuse to eat. But surprisingly I love this red pepper sauce. I use it for so many different kinds of preparations.

If u want a pasta that’s spicy and different, then this charred red bell pepper sauce pasta is especially for u.

bell pepper sauce

1 big red capsicum

3-4 big tomatoes

10-12 garlic flakes

4-5 dried red chillies

1 pkt amul cream

200 gms boiled pasta

100 gms each of mushroom, broccoli, baby corn, zucchini

1 tbsp of mixed dried Italian herbs

olive oil

salt


  1. Chop capsicum, tomatoes, garlic flakes and chillis and add it to the pan with a little oil
  2. Cook on high heat till soft and slightly charred though be careful not to burn it
  3. When cool blitz it in the mixer to a fine paste adding little water if necessary
  4. Heat oil, add the baby corn, sauté, then add the mushroom, sautee and then add the broccoli adn zucchini. add little salt and dried herbs.
  5. Add the boiled pasta and the sauce to the vegetables. Mix well and adjust seasoning.
  6. Add the cream and mix well. Shut the gas

Stuffed Mushrooms

stuffed mushrooms

Have u seen those cartoons that have these hearts popping out of their eyes when they see or hear something they love. Well I get like that when someone says mushrooms 😍😍, esp stuffed mushrooms.

stuffed mushrooms

I have been making these stuffed mushrooms for years and just realised for some reason have never featured them on the blog. Today woke up and said chalo lets quickly make them.

stuffed mushrooms

It’s a super fast recipe, easy for anyone to make and relatively healthy as it’s not deep fried. Trust me once u start making these you won’t be able to stop eating.


Ingredients
1 packet button mushrooms
1 finely chopped onion
Finely chopped coriander
10 flakes finally chopped garlic
2 tbsp bread crumbs
3-4 grated cheese cubes
Salt


  1. Wash the mushrooms and remove the stalks keeping the caps intact. Scoop a little to get a hollow Center in the caps.
  2. Chop these stalks fine
  3. In a pan sauté onion and garlic with little oil
  4. When translucent, add chilli, chopped stalks and salt. Fry on medium heat till cooked
  5. Add bread crumbs and sautée for 1-2 mins. Add coriander. Shut the gas.
  6. Stuff this masala in the mushroom caps
  7. Put in the microwave and microwave it for 10 mins at 600 degrees
  8. Top with cheese and microwave for another minute or till cheese melts.

Eggless Red Velvet Cuppies with Cream Cheese frosting

IMG_8117 1

My Achilles heel seems to be red velvet. Always stayed away from it. I attempted it once on my birthday and got a Maroon colour cake with a crusty texture. It was tasty but not the red velvet I wanted

IMG_8110

Tried another recipe today and the taste and texture is awesome but still didn’t get the bright red I am looking for. Maybe I was stringent with the colour, also I reduced the cocoa instead of using the mentioned amount. Next try will stick to the recipe and hope for a lovely bright red.

IMG_8107

The taste and texture of these eggless Cuppies is awesome and with this yum cream cheese frosting I had to to stop my son at 3 🙈.

IMG_8109

Ingredients

1 & 3/4 cup maida
1 cup castor sugar
2 tbsp unsweetened cocoa powder. just make sure you dont use dutch processed
1 tsp. baking soda
1/2 tsp salt
1 cup plain milk
1/2 cup olive oil
1 Tsp vanilla extract
1 Tablespoons white  vinegar
Red gel colour a few drops.


  1. Preheat oven to 175 deg C
  2. Line a 12 cupcake tray with paper liners
  3. Sift and mix the dry ingredients together
  4. Whisk wet ingredients (EXCEPT vinegar)
  5. Mix the wet and dry ingredients in 3 increments. Once all together, add the vinegar. whisk to incorporate .
  6. Bake for 15-20 mins. this time depends on the oven.


Cream Cheese Frosting

Ingredients:

1 pack of Philadelphia cheese (226 gms)

1 cup of whipping cream

1/2 cup icing sugar

1 tsp vanilla extract


  1. Whip the whipping cream till it gets soft peaks.
  2. whisk the cream cheese separately.
  3. Add the vanilla extract, icing sugar and cream cheese to the whipped cream and whisk it till mixed properly.
  4. Keep in fridge.

Mix Berry Vanilla Cake

Mix berry vanilla cake

What if you miss celebrating your dearest friend’s birthday. Simple you just surprise her the next time you meet. She is someone who keeps nagging, is it eggless  or please make eggless na.

IMG_7982


A recipe I see so many bakers using recently has been on my mind. Everyone has good things to say about Sumod Tom’s eggless cake and so decided to give it a shot.

Mix berry vanilla cake

Used his eggless Vanilla Sponge recipe which I have given below. Made a mix berry compote of blueberry and raspberry which i drizzled over the layers along with some whipped cream. Dressed it with strawberry roses. Yum


Eggless Vanilla Cake

Ingredients

All-purpose flour – 288 grams (2 ¼ cups)
Baking powder – 1 teaspoon
Baking soda – 1 teaspoon
Butter -1 stick or 113 grams
Sugar -2 table spoons
Vanilla essence – 2 teaspoon
Sweetened condensed milk – 1 tin 398 grams
Milk – 80 ml or 1/3 cup
Apple cider vinegar-1/2 Table spoons
Club Soda – 150 ml


  1. Ensure all the ingredients are at room temperature before you begin. It is better to keep the butter you will use outside the refrigerator for an hour before you begin the mixing process.
  2. Grease 2, 8 Inch baking tin with butter and dust with a little flour. Tip out all the excess flour. You can even grease and line the baking tin with baking paper.
  3. Add salt, baking powder and baking soda to the flour, and sieve the mix a few times and then set aside.
    Preheat the oven to 180oC.
  4. In a mixing bowl, add the measured 113 grams of softened butter and 2 tablespoons granulated sugar powdered. Start creaming the butter and sugar mixture with a mixer or with a spatula. Continue creaming until it is soft and fluffy.
  5. Add in the condensed milk, and cream the mix together until it is smooth and fluffy.
  6. Add apple cider vinegar to the milk and add this whole mix along with the vanilla essence to the butter and condensed milk mix. Fold the mix till its uniformly incorporated. Gradually add the flour mix in three parts, and fold in till completely mixed and no more flour is seen in the mix. Finally add the club soda in two parts and fold gently with the least number of mixes n folds.
  7. Pour the cake batter into the prepared baking tin. Tap on the work table, so that any air trapped in the batter can be expelled. You should push the batter from the center out to the edges just before you put the cake in the oven. This ensures a leveled cake top, rather than a domed one.
  8. Place the cake in the preheated oven and allow it to bake for 10 minutes at 180 C and then reduce to 160 C. Bake for another 20 to 30 minutes, or until a wooden skewer inserted in the center comes out clean and dry.
    Remove the cake from the oven and let it rest for 5 to 10 minutes.
  9. Gently tap the bottom of the baking tin or if required run a knife along the outer edges. Unmold the cake from the baking tin and let it cool completely on a wire rack. Slice the cake with a serrated bread knife and enjoy.


Blueberry & Raspberry Compote

Ingredients

1/2 cup dried  blueberry

1/2 cup fresh raspberry
1 cup water
1/2 cup sugar
1 tsp balsamic vinegar

1 tsp cornflour


  1.  take a pan and heat water and sugar in high
  2. when the sugar melts and just starts to thicken, then add the dried blueberries.
  3. When they soften, add the raspberry
  4. cook it on low for about 20 mins or till all the juices flow out and the berries are soft. Smash them a bit.
  5. add balsamic vinegar and give it a stir. Add the cornflour mixed with little water.
  6. Shut the gas. U will get a thick syrupy consistency.

Cheesy Bacon Egg Cups

Cheesy Bacon Egg Cups

U know those easy food videos that keep popping up in FB. The ones that are so droolsome. Well I save those and I keep wanting to try some of it but keep forgetting

Cheesy Bacon Egg cups

Today for breakfast, chose one of those from Tasty and boy was that good. Not good, it was awesome

My killer breakfast today Cheesy Bacon Egg cups.

IMG_7874 1

Ingredients

2 slices of bread

1 Britannia cheese cube

4 strips of fried Bacon

2 eggs

salt, oregano, chilli flakes

Olive oil for brushing


  1. Cut rounds from the bread of the size of your muffin tray.
  2. Grease the muffin tray, place the bread circles in 2 cavities.
  3. Cook your bacon but ensure not to make it too crispy. Place it around the wall of your muffin cavity to form a cup over the bread.
  4. Grate cheese and divide in 2 portions and put it in these cavities.
  5. Break an egg in each cavity and sprinkle it with salt, oregano and chilli flakes.
  6. Bake in a preheated oven at 180C for 12-15 mins. Keep an eye to ensure if you want the yolk runny. If you want the yolk cooked through, keep it for a longer time.
  7. Serve Hot

After Eight Layered Cuppies

After Eight Layered Cuppies

Another combination I love is mint and chocolate. Adore after eight chocolates and have been wanting to try that combination

After Eight Layered Cuppies

Here are chocolate cupcakes with peppermint flavour and whipped cream in the layers.

Layered cupcakes are a great option to mini cakes.

After Eight Layered Cuppies

Ingredients

4 eggs

1 1/4 cup sugar

1 cup all purpose flour

3/4 cup butter

1/2 cup cocoa powder

1 tsp vanilla essence

2 tsp baking powder

1 drop of Marson peppermint flavour

Whipped Cream

1 drop green gel colour

Sprinkles of your choice


  1. Line a 12 cupcake tray with paper liners. Pre heat the oven to 175C.
  2. Sieve the flour, baking powder and cocoa together.
  3. Beat the butter and sugar very well until thick and well combined.
  4. Add eggs gradually, and keep beating the mixture till it is mixed well and is fluffy. Gradually add in the dry ingredients and fold inslowly. Do not overbeat the mixture.
  5. Pour the mixture into the prepared tray.
  6. Bake in a hot oven for 15-20 minutes or till a toothpick comes out clean.
  7. Meanwhile, add green colour to the whipped cream and blend it well.
  8. When the cuppies are cool, slice them into 3 sections and layer with the colour whipped cream.
  9. Sprinkle some chocochips and sprinkles to dress it up before serving.